Contact Us

Use the form on the right to contact us.

You can edit the text in this area, and change where the contact form on the right submits to, by entering edit mode using the modes on the bottom right. 

9204581898

Relish is a unique cook's store in the heart of downtown Sheboygan, WI.

Find everything for the home chef, including the finest in cookware, cutlery, bakeware, utensils and gadgets galore. Independently owned and operated, we treat our customers like family and strive to provide the best selection and service anyone could need. Visit Relish to find innovative and reliable cookware and kitchen supplies from great national and local brands, discover fun and unique gifts for the cook in your life, and get inspired in one of our educational and entertaining cooking classes. 

Recipe Archive V

Easy Tikka Masala & Basmati Rice

Lia Soneson


In this recipe, we bring the wonderful flavors of chicken tikka masala to the table on any day of the week, thanks to the amazingly fast electric pressure cooker! Serve with fragrant basmati rice and generous sprinkles of chopped cilantro. YUM!

Easy_Tikka_v3_12.jpg

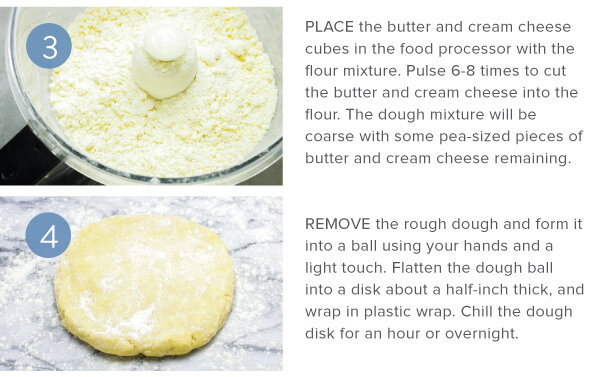
Easy Chicken Tikka Masala
Serves 4 - 6

Bring the wonderful flavors of this delicious dish home any day of the week thanks to the amazingly fast electric pressure cooker! This recipe calls for a lighter approach using slightly less butter than other recipes. A combination of Greek yogurt and coconut milk (instead of heavy whipping cream) adds a bit of extra tanginess to the global flavors. Savory spices mingle with fresh garlic, ginger, and tomatoes. The coconut milk creates a dreamy, silky sauce. Serve with fragrant basmati rice and generous sprinkles of chopped cilantro.
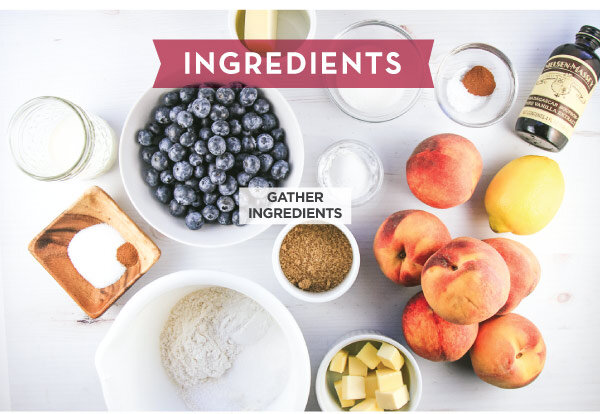
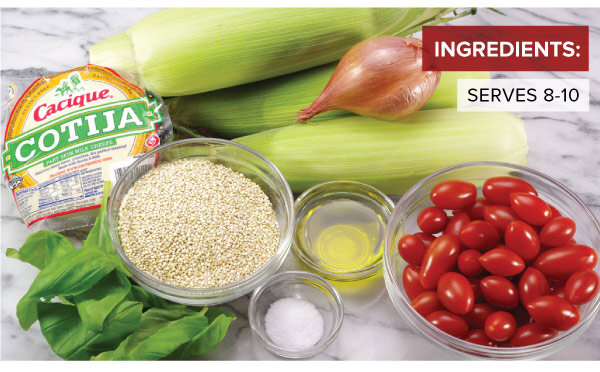
Ingredients:
4 large boneless chicken breasts, cut into 1” chunks
5 cloves garlic, finely minced
1-1/2 tablespoons fresh ginger, finely grated
3 tablespoons tomato paste
1 (28 oz.) can crushed tomatoes
2-1/2 teaspoons Garam Masala, divided
1 tablespoon ground cumin
1 tablespoon paprika
1/2 teaspoon cayenne pepper
1 teaspoon ground coriander
2 teaspoons Kosher salt
1/2 teaspoon ground black pepper
1 cup coconut milk
1 cup plain Greek yogurt
4 tablespoons butter, sliced into tablespoons
1 tablespoon cilantro, minced, plus additional for garnish

Electric Pressure Cooker Directions:
1. Prepare the garlic and ginger. Mince the garlic finely and grate the ginger into a fine paste. 

2. Place the cut chicken in the bottom of an electric pressure cooker and then toss with the garlic and ginger.

3. In a large bowl, whisk together the tomato paste and crushed tomatoes until well combined.

4. Add the spices to the tomato mixture: 2 teaspoons Garam Masala, cumin, paprika, cayenne, coriander, Kosher salt, and black pepper. Stir until well combined.

5. Pour the spiced tomato mixture over the chicken. Toss until coated.

6. Cover, and cook on high pressure for 10 minutes.

7. Carefully release the pressure according to your appliance’s instructions. Check that the chicken is fully cooked and is at 165 degrees F. If the chicken needs more time, continue to cook on the simmer function until the chicken reaches 165 degrees in the center.

8. Once the chicken is fully cooked, add the coconut milk, yogurt, butter, 1/2 teaspoon Garam Masala and minced cilantro. Stir until combined and a sauce begins to form. If the sauce needs additional time to thicken, switch to the simmer function, and stir and simmer until the sauce thickens to your desired consistency.

9. Serve warm over basmati rice. Garnish with additional minced cilantro.

Basmati Rice:
1 tablespoon butter
2 tablespoons shallot, minced
2 cups basmati rice, rinsed
1/2 teaspoon Kosher salt
3-1/2 cups water

Rice Directions:
1. Rinse rice with cold water until the water runs clear.

2. Using a heavy-bottomed pot with a lid, sauté the shallot in the butter until the the shallot becomes translucent. Add the rice, and stir it until coated and every grain has a sheen.

3. Add the water and salt, and bring to a boil. Stir occasionally to make sure that the rice doesn't stick to the bottom. Once boiling, turn the heat to low and cover with a tight-fitting lid. Simmer the rice on low for 18-20 minutes or until the rice becomes tender.

4. Remove from heat, and let set for 10 minutes with the lid still on. Fluff with a fork before serving.


Grilled Chicken 3 Ways

Lia Soneson

 
Chicken_3ways_v2_01.jpg

Let's make dinnertime easier! Prepare a big batch of marinated and grilled chicken breasts and then transform that chicken into three delicious meals. IN THIS ISSUE, we feature three easy recipes using grilled chicken - fajitas, quesadillas, and green enchiladas.

Garlic & Lime Grilled Chicken

Garlic & Lime Grilled Chicken:
6 chicken breasts - some now, some later 

Marinade:
1 tablespoon lime zest (about two small limes)
2 tablespoons chili powder
2 tablespoons garlic powder
1 tablespoon paprika
1 tablespoon cumin
1 tablespoon sugar
1 teaspoon pepper
1 teaspoon Kosher salt
1/2 cup vegetable oil
2 tablespoons fresh lime juice

Garlic & Lime Grilled Chicken Directions:
1. In a small bowl, combine the lime zest and the marinade spices: chili powder, garlic powder, paprika, cumin, sugar, pepper, and salt. Stir together until evenly mixed. 

2. Place the chicken breasts in a large bowl or in a sealable bag inside of a large bowl. 

3. Pour the vegetable oil and lime juice over the chicken, then sprinkle with the spice mixture. 

4. Rub the chicken with the spices until it is completely coated. 

5. Cover the chicken and refrigerate. Marinate the chicken in the refrigerator for 3-4 hours or overnight. 

6. Fire up the grill! Heat the grill; ensure your grill grates are clean and well-oiled. 

7. Grill the chicken over direct heat until the internal temperature reaches 165 degrees F, turning as needed. 

8. Remove the chicken from the grill and let it rest for 10 minutes. 

9. Enjoy the chicken immediately or slice, dice, or shred to use in future recipes.


Chicken Fajitas
Serves 4 

Fajitas are a colorful, delicious, and healthy option for getting dinner on the table quickly! With the chicken already marinated and grilled, simply grill onions and peppers to add to the chicken. Complete the tasty fajitas with an array of toppings! Some of our favorite fajita toppings include sour cream, cilantro, salsa, hot sauce, a squeeze of lime, salsa, and a little guacamole! 

Fajitas:
2 chicken breasts (marinated, grilled, and diced)
4 flour tortillas, warmed
1 red pepper, sliced into strips
1 green pepper, sliced into strips
1 sweet onion, sliced pole to pole
2 tablespoons olive oil
1/2 teaspoon Kosher salt
1/2 teaspoon pepper 

Toppings:
Sour cream, Avocado, Lime wedges,  Fresh cilantro leaves Salsa, and/or hot sauce 

Directions:
1. Prepare the chicken breasts according to the Garlic & Lime Chicken directions above. 

2. Prepare the veggies. In a large bowl, toss the sliced peppers and onion with the olive oil, Kosher salt, and pepper. Grill the peppers and onion in a grill basket over direct heat or sauté in a skillet on the stovetop. Stir the vegetables often and cook until slightly charred in spots and cooked to your desired tenderness. 

3. Toss the cooked vegetables with the grilled chicken slices.

4. Serve with warmed tortillas and a variety of your favorite toppings.


Loaded Chicken Quesadillas
Serves 4 

These quesadillas are loaded with grilled and diced chicken, black beans, spinach, corn, and plenty of cheese. We love quesadillas for lunch or dinner. Everyone can customize their order to their own preference. Add additional flavor with a variety of toppings! 

Quesadillas:
2 chicken breasts (marinated, grilled, and diced)
8 tortillas
8 oz pepper jack cheese, grated
1 can (15 oz) black beans, rinsed and drained
8 oz frozen corn, thawed
4 oz spinach leaves 

Toppings:
Sour cream,  Avocado, Lime wedges,  Fresh cilantro leaves, Salsa,  Pickled jalapeños, Hot sauce 

Directions:
1. Prepare the chicken breasts according to the Garlic & Lime Chicken directions above. 

2. Use a panini press or a skillet on the stovetop to cook the quesadillas. 

3. Load a tortilla with a layer of pepper jack cheese, then add all of the quesadilla ingredients: diced chicken, black beans, corn, and spinach leaves. Finish with another layer of cheese, then top with another tortilla. 

4. If cooking on the stovetop use low heat and practice patience while the cheese melts! Using a large spatula, flip the quesadilla after the cheese has melted enough to hold it together. 

5. Cut the quesadilla into wedges and enjoy warm with an array of toppings.


Chicken Green Enchiladas
Makes 8 enchiladas 

Cheesy and creamy, these green enchiladas are one great definition of comfort food! The green enchilada sauce is enhanced with a filling of grilled and diced chicken, white beans, green chilies, cheese, onion, garlic, herbs, and a little sour cream. After stuffing and rolling the enchiladas, add another layer of sauce on top. Don’t forget to finish with a hearty layer of cheese. After baking, garnish with fresh cilantro. So tasty! 

Enchiladas:
2 garlic & lime chicken breasts (marinated, grilled, and sliced)
2 tablespoons olive oil
1 onion, diced
2 cloves garlic, minced
1 teaspoon dried oregano
1 teaspoon dried cumin
1/2 teaspoon Kosher salt
1/2 teaspoon freshly ground pepper
1 can (4 oz) diced green chilies
1 can white beans, rinsed and drained
2 cups Monterey Jack cheese, shredded
1 can (28 oz) green enchilada sauce
1 cup sour cream 

Garnishes:
Lime wedges, Fresh cilantro leaves, Pickled jalapeños, Hot sauce 

Directions:
1. Preheat the oven to 400 degrees F. 

2. Sauté the onion and garlic in a large skillet until the onion is translucent. Season the onions with oregano, cumin, salt, and pepper. 

3. Add the green chilies, white beans, 1 cup of grated cheese, 1 cup green enchilada sauce, and 1 cup of sour cream. Stir to combine. Add the diced chicken and fold together until combined. 

4. Spoon 1 cup of enchilada sauce around the bottom of the pan. This recipe makes about 8 enchiladas which can fit into a standard 9x12 casserole pan, or individual sized dishes that fit 2 enchiladas each. 

5. Fill the tortillas with a scoop of the chicken mixture and roll up tightly. Place the stuffed tortillas seam side down in the pan. Pack the pan tightly. 

6. Spoon more enchilada sauce on top of the rolled tortillas. Sprinkle one more cup of grated cheese on top. 

7. Bake for 20-25 minutes or until the cheese has started to brown and the enchiladas are bubbling hot. 

8. Serve warm with your choice of garnishes.


Sweet Potato Tacos

Lia Soneson

 
SweetPotatoTacos_v2_01.jpg

This time of year we love any excuse to use our grill.

IN THIS ISSUE, we feature roasted sweet potato tacos with grilled sweet corn and tangy guacamole. Good tacos are the product of many quality parts, and wow, are these parts tasty! 

Sweet Potato Tacos with Grilled Corn and Avocado 
Makes 12 small tacos

We love any excuse to use our grill. This recipe features roasted sweet potato tacos with grilled sweet corn and tangy guacamole. Good tacos are the product of many quality parts, and wow, are these parts tasty!

For the Roasted Sweet Potatoes:
2 sweet potatoes peeled and cubed into 1” pieces
1 tablespoon olive oil
1/4 teaspoon cumin
1/4 teaspoon cayenne pepper
1/4 teaspoon Kosher salt

For the Simple Guacamole:
2 avocados
1 clove garlic
1 jalapeño
1/2 small yellow onion, finely chopped
1 small lime, juiced
1 tablespoon olive oil
1/4 teaspoon Kosher salt
1/4 teaspoon pepper

Directions:
1. Preheat the oven to 425° F. Toss the cubed sweet potatoes with olive oil, cumin, cayenne and salt. Roast the sweet potato cubes in a large roasting dish for 30-40 minutes until tender and the edges begin to brown.

2. Prepare the guacamole by combining all of the guacamole ingredients in a medium bowl and mash with a fork until creamy. Transfer the guacamole to a serving bowl, and set aside.

3. In a medium pan over medium heat, cook the onion in the olive oil until the onion is soft and translucent, about 3-5 minutes. Add the black beans, cumin, chili powder, salt and pepper and cook over low heat, stirring occasionally to the beans don’t scorch.

4. Oil and preheat grill. Drizzle the corn with olive oil and sprinkle with salt and pepper. Grill the corn over direct heat for about 10 minutes, turning often until charred all over. Remove from the grill and let the corn cool slightly. Cut corn from the cob.

5. While the corn cools, grill the flour tortillas until grill marks appear.

6. Remove the potatoes from the oven and assemble the tacos, first layering the beans, then the sweet potatoes, then the corn, and finally the guacamole. Top with crumbles of cotija cheese, sliced green onions, and a squeeze of lime.


Summer’s End Dinner

Lia Soneson

 
SummerDInner_v1_01c.jpg

Summer’s end is nearly here – time to plan one last hurrah on the back patio! IN THIS ISSUE, we’ve planned a perfect end-of-summer dinner menu with Orange & Thyme Pork Tenderloin, an Arugula, Heirloom Tomato & Whipped Ricotta Salad, Grilled Carrots with Minted Yogurt Sauce, and a refreshing Blackberry & Lemon Iced Tea. Cheers to this (Unusual) Summer! 

Blackberry & Lemon Iced Tea
Makes 8 cups iced tea

Nothing says summer like iced tea. We’ve decided to spruce up this favorite by adding fresh blackberries and slices of lemon to the tea we love so much. A great accompaniment to any al fresco meal.

Ingredients:
2 cups fresh blackberries, divided
1/4 cup sugar
8 cups water, divided
8 black tea bags
1 lemon, sliced

Directions:
1. Mash or puree 1 cup of blackberries with 1/4 cup sugar.

2. Bring 5 cups of water to a boil. Add the tea bags to the hot water and steep for 6-8 minutes, then remove the tea bags.

3. Pour the hot tea over the blackberry mixture and let sit for 1 hour. Then, strain through a fine mesh sieve.

4. Add 3 cups of cold water and taste the tea. Adjust the sweetness to your preference, then refrigerate for 2 hours or overnight.

5. Serve on ice with a garnish of lemon wedges and remaining cup of whole blackberries.

6. Optionally, add a float of bourbon on top before serving.


Arugula, Heirloom Tomato & Whipped Ricotta Salad
Serves 4 - 6

Whipped ricotta turns this salad into a creamy, dreamy delight! Spicy arugula complements the lemon-y, smooth whipped ricotta and the ripe grape tomatoes punctuate each bite with bursts of brightness.

Salad Ingredients:
15 oz fresh ricotta cheese
1 tablespoon olive oil
1 tablespoon fresh lemon juice
1 teaspoon lemon zest
1/4 teaspoon kosher salt
6 oz arugula
Heirloom cherry tomatoes
Basil, chiffonade cut for garnishing

Vinaigrette Ingredients:
3 tablespoons olive oil
1 tablespoon white wine vinegar
Juice of half a lemon
Salt and pepper

Directions:
1. In a food processor or high-powered blender, whip the ricotta with olive oil, fresh lemon juice, lemon zest, and salt until very smooth.

2. Whisk the vinaigrette ingredients together in a small jar.

3. Toss the arugula with the vinaigrette. Spread the ricotta on a large serving plate.

4. Top the ricotta layer with arugula, heirloom cherry tomatoes, and a garnish of basil.


Grilled Carrots with Minted Yogurt Sauce
Serves 4 - 6

Carrots are transformed on the grill! With some simple seasonings and the utility of a grill basket, simple carrots become elevated into a flavorful, sweet, and savory side! Dressed up with an easy za’atar yogurt sauce, this side dish is worthy of repeating often.

Ingredients:
10 carrots, or about 2 lbs carrots, peeled and cut into 3” matchsticks
3 tablespoons olive oil
1/2 teaspoon garlic powder
1/2 teaspoon of Kosher salt
1/2 teaspoon freshly cracked black pepper
1 tablespoon sugar

Yogurt Sauce:
1 cup plain Greek yogurt
1 tablespoon fresh lemon juice (or about half of a small lemon)
1/2 teaspoon Kosher salt
1/2 teaspoon freshly ground black pepper
1 teaspoon Za’atar spice blend

Garnish:
Fresh cilantro leaves, coarsely chopped

Directions:
1. Peel the carrots, and cut into 3” long matchsticks. 

2. Prepare the carrots for grilling: Place the carrots in a large bowl. Drizzle with olive oil and toss Sprinkle with garlic powder, Kosher salt, pepper, and sugar.

3. Grill the carrots in a grill basket over high heat until slightly blistered, a little charred, and just tender, stirring often.

4. While the carrots are grilling, prepare the yogurt sauce by whisking all of the yogurt sauce ingredients together.

5. Serve the grilled carrots with a drizzle of yogurt sauce, and a generous garnish of fresh cilantro.


Orange & Thyme Pork Tenderloin
Serves 4 - 6

Pork tenderloins are perfectly primed for adapting to flavorful marinades. This marinade features fresh orange juice, thyme leaves and a few other classic marinade flavormakers like Dijon mustard, soy sauce, brown sugar, and garlic powder. It’s an easy and delicious recipe!

Ingredients:
2 pork tenderloins

Marinade:
1 tablespoon Dijon mustard
2 cloves garlic, minced
2 tablespoons brown sugar
2 tablespoons orange juice
3 tablespoons soy sauce
2 tablespoons olive oil
1/2 teaspoon Kosher salt
1/2 teaspoon freshly ground black pepper
1/2 teaspoon garlic powder
4 sprigs of thyme, leaves only

Directions:
1. Prepare the marinade in a medium bowl by whisking all of the ingredients together.

2. Add the pork tenderloins to the marinade, cover, and refrigerate for at least one hour for the flavors to infuse into the meat.

3. Fire up the grill! Let the marinated tenderloins warm to room temperature for 20 minutes before grilling. Place the marinated tenderloins on the hot, well-oiled grill, and sear for 3-4 minutes on each side. Turn until all sides have seared and browned, and then, turn o one burner (or turn to low) to create a direct/indirect environment. Place the seared tenderloins on the cooler, indirect side, and continue to cook until their internal temperature reaches 145 degrees F.

4. Once the pork tenderloins reach 145 degrees F, place on a clean plate, and cover loosely with a tinfoil "tent" for about 10 minutes. This allows the meat to rest, and the juices to soak back into the meat. 5. Slice the grilled tenderloins, and serve warm.


Peach-Blueberry Cobbler

Lia Soneson

 
Cobbler_v1_01.jpg

Fresh, ripe blueberries and peaches are truly one of the best parts of summer. The window is short; enjoy both in as many ways as you can! Definitely include this cobbler on your culinary bucket list a couple of times before the season is over. There are many types of cobbler - some cake-like, others with a more biscuit-like character. This time around, we’re featuring a fabulous biscuit-type topping. Slightly sweetened biscuits bake atop a pan of bubbling fruit. The only thing left to do is scoop your favorite vanilla ice cream on top!

Peach & Blueberry Cobbler
Serves 4 - 6

Fresh, ripe blueberries and peaches are truly one of the best parts of summer. The window is short; enjoy both in as many ways as you can! Definitely include this cobbler on your culinary bucket list a couple of times before the season is over. There are many types of cobbler – some cake-like, others with a more biscuit-like character. This time around, we’re featuring a fabulous biscuit-type topping. Slightly sweetened biscuits bake atop a pan of bubbling fruit. The only thing left to do is scoop your favorite vanilla ice cream on top!

Filling:
6 peaches, pitted, peeled, sliced
2 cups blueberries, washed and destemmed
1 tablespoon lemon juice, freshly squeezed
1/8 cup white sugar
1/8 cup brown sugar
1 tbsp cornstarch
1/8 teaspoon cinnamon
1/8 teaspoon salt

Topping:
1-2 tablespoons butter, melted
1 tablespoon white sugar
1/8 teaspoon cinnamon

Biscuit Topping:
2 cups all-purpose flour (plus 1/4 cup extra)
1/4 cup white sugar
1 tablespoon baking powder
1 teaspoon Kosher salt
1/2 cup chilled butter, diced into
1/2-inch cubes
3/4 cup milk (plus 2-3 tbsp more)
2 teaspoons vanilla extract

Serve with:
Vanilla ice cream

Directions:
1. Preheat the oven to 425°F. Prepare a ceramic baking dish (about a 2-quart capacity) by lightly buttering.

2. Prepare the filling. Prepare the peaches by peeling, pitting, and slicing into thin, crescent-shaped slices.

3. In a large bowl, add the blueberries to the peach slices. Sprinkle with the white sugar, brown sugar, cornstarch, cinnamon, and salt. Stir until combined.

4. Place the peaches and blueberries in the prepared baking dish and place in the oven for 20 minutes to jumpstart the baking process.

5. Meanwhile, prepare the biscuit topping. In a large mixing bowl, mix together the flour, sugar, baking powder, and salt. Stir to evenly combine the ingredients.

6. Add half of the diced butter to the flour mixture and combine well with a pastry blender or fork. Add the remaining diced butter and continue to blend leaving pea-sized pieces of butter.

7. Add the vanilla extract to the milk. Add the milk mixture to the flour-butter mixture, and stir together until a rough dough is formed. Turn out the dough onto a lightly floured board and gather the dough together. Knead 2-3 times to form a dough ball. Flatten the dough ball to about a 1/2-inch thickness.

8. Using a 2-inch biscuit cutter, cut circles of dough.

9. Place the biscuits on top of the hot fruit in the baking dish. Brush the tops of each dough piece with melted butter. Extra biscuit dough? Simply bake in the oven on a baking sheet until golden brown.

10. In a small bowl, stir together the sugar-cinnamon topping. Sprinkle the mixture on top of the entire dish.

11. Continue baking in a 425°F oven until the biscuit dough is cooked through and the tops nicely golden brown, about 15 more minutes. Remove from the oven and allow to cool for 30 minutes.

12. Serve warm (not hot) with your favorite vanilla ice cream.


Quick Pickles

Lia Soneson

 
Quickles_01.jpg

Say the word, "pickle," and your mouth responds. The salty-sour taste of a pickle satisfies some intangible need while adding plenty of pizzazz to any plate. Pickles come in many forms -- nearly any fruit or vegetable can be pickled into your new favorite. 

IN THIS ISSUE, we feature the simplicity of making your own small batches of refrigerator pickles with an easy no-canning approach.

Easy Pickled Asparagus 
Makes about one quart

These pickled asparagus spears are a beautiful and tasty addition to any crudite or antipasto plate! The quick blanching and plunge in ice water ensures that the final pickled spears are tender. The white wine vinegar brine is mild in flavor while the rosemary, crushed red pepper, and garlic season the spears nicely.

Ingredients: 

1 pound asparagus, trimmed to 1" shorter than the jar 

2 cloves garlic, whole 

1/2 tablespoon mustard seeds

1/2 tablespoon peppercorns 

1-1/4 cups white wine vinegar (at least 5% acidity) 

1-1/4 cups water

1 tablespoons kosher salt

1 tablespoon sugar

1 teaspoon crushed red pepper flakes 

2 sprigs rosemary

Directions: 

1. Blanch the asparagus. Boil in a large pot of water for 2 minutes, and then plunge into an ice bath to preserve the green color and to stop from over-cooking.

2. Clean and sterilize a quart-sized canning jar. Fill the jar with the blanched asparagus and garlic. Tightly pack the asparagus and rosemary in the jar with tips up. Place the mustard seeds, peppercorns, and crushed red pepper into the jar.

3. Prepare the brine. In a saucepan, bring the vinegar, water, salt, and sugar to a boil. Boil for three minutes. Let the brine cool.

4. Pour the brine into each jar, covering the vegetables completely.

5. Cover and refrigerate the pickles overnight before serving.

6. Keep refrigerated. Enjoy the pickles for up to one week.

Quick Carrot Pickles 
Makes about 2 pints

These pickled asparagus spears are a beautiful and tasty addition to any crudite or antipasto plate! The quick blanching and plunge in ice water ensures that the final pickled spears are tender. The white wine vinegar brine is mild in flavor while the rosemary, crushed red pepper, and garlic season the spears nicely.

Ingredients: 

6 medium carrots, trimmed into sticks 1/2" short than the jar 

1/2-inch fresh ginger, peeled and thinly sliced 

1 clove garlic, thinly sliced

Brine Ingredients: 

1 cup apple cider vinegar

1 cup water 

1 tablespoon kosher or pickling salt 

1 tablespoon sugar

1 teaspoon turmeric

1/2 teaspoon ground coriander 

1/2 teaspoon mustard seeds 

1/2 teaspoon pepper corns 

4-6 whole cloves

Directions:

1. Slice the carrots into sticks -- approximately the same size and length.

2. Closely pack the carrot sticks in two clean canning jars along with the ginger and garlic slices.

3. In a medium saucepan, bring the brine ingredients to a boil for 3 minutes. Remove the pickling liquid from heat and slowly pour over the carrots until about 1/4 inch from the top, covering the carrots completely.

4. Cover and refrigerate the pickles overnight before serving.

5. Keep refrigerated. Enjoy the pickles for up to one week.

Spicy Pickled Green Beans 
Makes about 3 pints

You’ll enjoy these green beans that feature a kick! Pickled green beans get a little spicy with the addition of jalapeño strips. Try these spicy pickled green beans in a salad, or on their own as a snappy snack!

Ingredients: 

1 pound green beans, trimmed to 1/2" shorter than the jar

3 jalapeños, sliced into thin strips 

1 clove garlic, thinly sliced 

1 tablespoon mustard seeds

1 tablespoon peppercorns

1-1/2 cups apple cider vinegar 

1-1/2 cups water 

1 tablespoons kosher salt

1 tablespoon sugar

Directions: 

1. Blanch the prepped green beans and jalapeño strips by boiling in a large pot of water for 2 minutes. Plunge them into an ice bath to preserve the green color and to stop from over-cooking.

2. Clean and sterilize 3 pint-sized canning jars. Fill the jars with the blanched green beans, jalapeño slices, and garlic slices. Tightly pack the green beans in the jar vertically. Divide the mustard seeds and peppercorns into the jars.

3. Prepare the brine: In a saucepan, bring the vinegar, water, salt, and sugar to a boil. Boil for three minutes. Let the brine cool.

4. Pour the brine into each jar, covering the green beans completely.

5. Cover and refrigerate the pickles overnight before serving.

6. Keep refrigerated. Enjoy the pickles for up to one week.


Summer Rolls with Spicy Peanut Sauce

Lia Soneson

 
Summer_Rolls_V1_01.jpg

Avoid turning on your stove or oven - make fresh summer rolls for dinner instead! A fun alternative to a salad, rice paper wrapped “summer rolls” are a delicious way to eat a healthy serving of summer vegetables. Bring these colorful summer rolls with spicy peanut sauce to the table – they will be eaten up in no time!

Avoid turning on your stove or oven - make fresh summer rolls for dinner instead! A fun alternative to a salad, rice paper wrapped “summer rolls” are a delicious way to eat a healthy serving of summer vegetables. Bring these colorful summer rolls with spicy peanut sauce to the table – they will be eaten up in no time!

Ingredients:

1 package rice paper wrappers
2 cups fresh edamame, shelled (or thawed frozen edamame)
1 red pepper, cut into matchsticks
3 green onions, sliced
2 carrots, spiralized
1 bunch cilantro leaves
1 avocado, thinly sliced
1/4 red cabbage, thinly sliced

Spicy Peanut Sauce:
1/2 cup fresh peanut butter
1 tablespoon chili garlic sauce
1 tablespoon soy sauce
3 teaspoon rice wine vinegar
1 teaspoon sesame oil
1 lime, juiced 1 clove garlic, finely minced, or crushed
1 tsp ginger, finely minced, or grated

Directions:
1. Prepare all of the vegetables and stage in individual prep bowls.

2. Whisk together all of the sauce ingredients, thinning with water, as needed.

3. Singly, submerge the rice wrappers in water for 15-20 seconds each, then artfully fill with the vegetables. Fill the bottom 1/3 of the wrapper with veggies, leaving a generous margin to each side. Roll once half-way covering veggies. Place additional vegetables in the top 1/3 taking care to artfully place so that a beautiful pattern may be seen on the top 1/3 of the wrap. Fold over both sides on wrap. Finish the rolling motion until the wrap is fully rolled and sealed.

4. Slightly moisten a serving plate, and place the rolls on the plate in a single layer (not touching). Refrigerate for a short time or enjoy them immediately. (They will not keep moist for very long, so enjoy them soon!

5. Serve the rolls whole or cut in half with a personal serving of sauce on the side.


They're Here! Summer Vegetables Ready to Stuff

Lia Soneson

 
StuffedVeggies_v2_01.jpg

We're taking advantage of the fresh harvests found at farmers' markets, in our gardens, and at roadside stands, and are making scrumptious stuffed vegetables ready to satisfy any craving! 

IN THIS ISSUE, we stuff peppers, mushrooms, and zucchini while sharing tips for cleaning veggies properly. PLUS, a bonus recipe, stuffed jalapeños!


Make Your Own Summer Blueberry Hand Pies

Lia Soneson

 
Blueberry_HandPies_v1_01.jpg

SUMMER BLUEBERRIES burst with a flavor that only happens when truly in season. One of our favorite ways to celebrate these little nutritional powerhouses is to place them in hand pies. The berries’ diminutive size fit neatly into petite packets, which highlight the rich cream cheese-based crust — a truly mouth-watering match!


Three Super Tasty, Herbalicious Green Sauces

Lia Soneson

 
Green_Sauces_v1a_01.jpg
Fresh herbs are a great way to add flavor and complex character to the dishes we cook. Ranging from subtle to dominant, from complementary to defining, the availability of summer herbs is upon us! IN THIS ISSUE, we feature three, green herb-based sauces that originate from different parts of the world. Try them -- they’ll bring big flavor impact to your table!
 

Try Our Grilled Corn and Quinoa Summer Salad

Lia Soneson

 
CornSalad_v1_01.jpg

Two grains, corn and quinoa, share an ancient history as important crops in the developing Americas. IN THIS ISSUE, we’ve made them the cornerstone of a salad that’s hearty, and nutritionally balanced enough to be the main entrée. Grilled sweet corn only gets tastier with the addition of healthy quinoa, summer-ripe tomatoes, fresh basil, and a bright lemony vinaigrette.


Refresh with Spicy Salmorejo Gazpacho

Lia Soneson

 
Gazpacho_v2_01.jpg

Spaniards have perfected many things, like tapas, wine, and paella. So it’s no surprise they have also mastered gazpacho. This cold, tomato-based soup is the perfect dish to enjoy on warm summer nights — it’s delightfully bright, yet surprisingly rich.

With this recipe, we revisit the Andalusian classic, Salmorejo, which incorporates a loaf of bread into a blended tomato base. The result is creamy, refreshing, and oh, so satisfying!


Sweet Endings! Three Summer Fruit Pies

Lia Soneson

 
Pies2020_v1_01.jpg

Pies, galettes, and crostatas, oh my! Celebrate summer fruit with a beautiful baked delight. IN THIS ISSUE, we acquaint you with some of our very favorite fresh fruit desserts. We include three delicious recipes that provide a sweet finish to any summer occasion.


A Seasonal Treat! Sweet Biscuit Strawberry Shortcake

Lia Soneson

 
Strawberry_Shortcake_v2_01.jpg

One of our favorite ways to enjoy fresh strawberries is as strawberry shortcake -- the biscuit kind, not the cake kind. We grew up with this treat, so its seasonal comeback revives all kinds of wonderful memories in addition to all the great tastes! In this recipe, chopped strawberries are added to the biscuit dough, which makes the biscuits sweeter, and the biscuit color a lovely shade of pink! 


Tips for Making Better Salads, PLUS, 3 Entree-Worthy Salads

Lia Soneson

 
Salads2020_v2_01.jpg

With summertime local produce thriving, it’s time to put entrée salads in the starring role on the dinner table. IN THIS ISSUE, we present three hearty salads, each with a dazzling burst of flavors. We’re sharing our favorite tips for summer grilling, how to make mango rosettes, and easy basics to follow when composing homemade salad dressings! It’s time to revel in the season of ripe produce — choose to serve a satisfying salad for dinner.


Bold flavors in a light spring soup!

Lia Soneson

 
LeekSoup_v1_01.jpg

Perfect for a first course or a lovely spring lunch, this savory soup features the bold flavors of roasted garlic and tender spring leeks. The creamy texture is achieved not with cream or butter, but with Yukon gold potatoes and a powerful blender. The crispy bacon garnish adds the perfect salty crunch to each spoonful.


Tips for Grilling Kebabs! PLUS, Three Delicious Recipes

Lia Soneson

 
Kebabs2020_v2_01.jpg

The warm summer nights are a constant invitation to light up the grill. The grill anchors the outdoor kitchen, and becomes the center for al fresco dining and leisurely time spent with the family.

IN THIS ISSUE, we're grilling colorful kebabs made extra-delicious thanks to mouth-watering marinades. Try skewering up one of these three kebab recipes for a tasty summer supper on the grill.


Fresh Cream Puffs with Berry Filling

Lia Soneson

 
Cream_Puffs_v3_01.jpg
Expanding your repertoire of kitchen skills these days? Add cream puffs to your list of culinary mastery while celebrating the return of fresh berries. The light, delicate, cream puffs with sweet berry filling are perfect for Mother’s Day, too! This recipe starts with a classic French pâte à choux and finishes things off with bright, jammy berries, and homemade whipped cream.
 

We Can Still Grill, Right? Brats and Amazing Sides

Lia Soneson

 
Brats_v2_01.jpg

We're all bonding with our homes more these days! Mix up mealtime with a "picnic" on the patio, deck, or even driveway! And, there's no time like the present to get some summer grilling underway! 

IN THIS ISSUE, we've assembled a delicious menu for an at-home outdoor dinner: beer-boiled then grilled brats, zipped-up baked beans, and a grilled potato salad ready to elevate the moment!