Contact Us

Use the form on the right to contact us.

You can edit the text in this area, and change where the contact form on the right submits to, by entering edit mode using the modes on the bottom right. 

9204581898

Relish is a unique cook's store in the heart of downtown Sheboygan, WI.

Find everything for the home chef, including the finest in cookware, cutlery, bakeware, utensils and gadgets galore. Independently owned and operated, we treat our customers like family and strive to provide the best selection and service anyone could need. Visit Relish to find innovative and reliable cookware and kitchen supplies from great national and local brands, discover fun and unique gifts for the cook in your life, and get inspired in one of our educational and entertaining cooking classes. 

Recipe Archive V

Filtering by Tag: butter

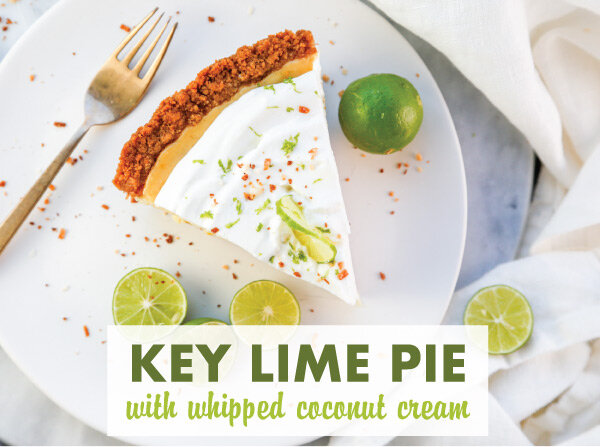
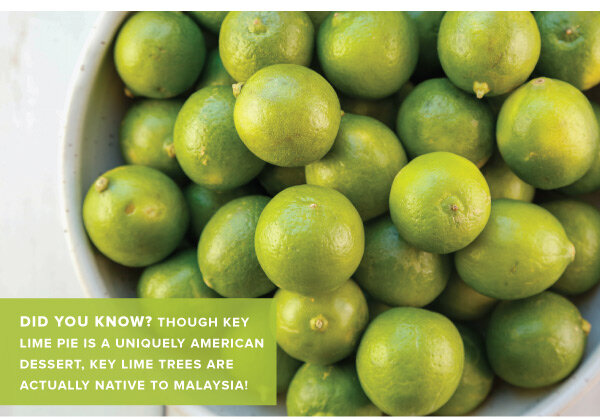
Key Lime Pie

Lia Soneson

 
Key_Lime_Pie_v2_01.jpg

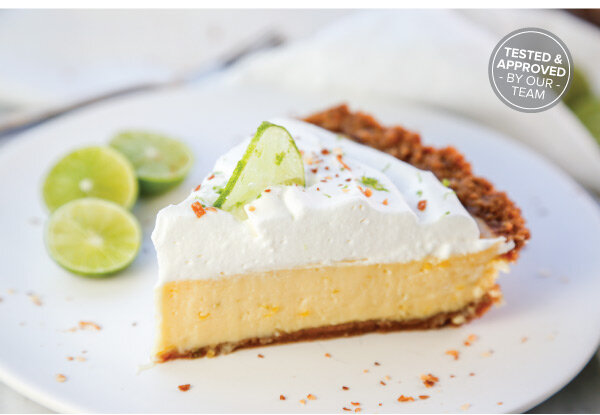
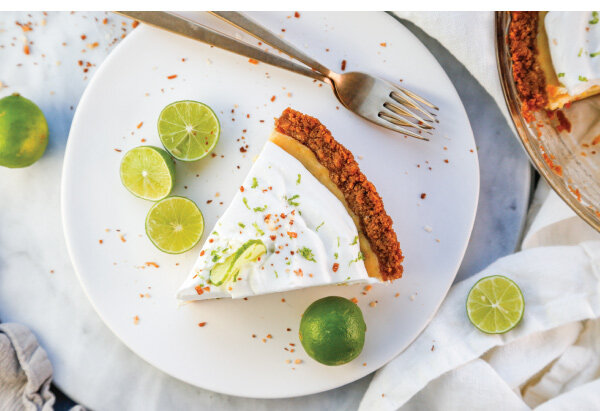
A true summer classic, tart and sweet Key Lime Pie is one of our favorite desserts! For our version, we’ve used a classic graham cracker crust filled with a surprisingly simple custard made of key lime juice, key lime zest, eggs, and sweetened condensed milk. The creamy, smooth filling is topped with a generous amount of whipped coconut cream to double down on the tropical flavors of this wonderful treat.

Key Lime Pie with Whipped Coconut Cream
Makes one 9" pie

Pie Filling:
2 cans (14 oz each sweetened condensed milk
7 large egg yolks, beaten
3/4 cup freshly squeezed key lime juice
1 tablespoon key lime zest

Coconut Whipped Cream:
1 cup cold whipping cream
1/3 cup coconut cream
1/4 cup powdered sugar
1 teaspoon vanilla extract

Toasted Coconut Graham Cracker Crust:
1 -1/4 cup graham cracker crumbs
2 tablespoons sweetened coconut flakes, toasted
2 tablespoons granulated sugar
1 tablespoon brown sugar
6 tablespoons butter, melted
Pinch of salt

Garnish:
Key lime zest, lime slices, and/or toasted coconut

Directions:
1. Prepare the key lime pie filling by whisking together the sweetened condensed milk, egg yolks, key lime juice, and key lime zest until smooth. Cover with plastic wrap and let the mixture rest and thicken at room temperature for about 20 minutes.

2. Meanwhile, preheat the oven to 325° F. In a food processor, pulse the graham crackers and toasted coconut flakes until they are ground into fine crumbs. Pour the crumb mixture into a medium bowl and stir in the sugar and salt until evenly incorporated. Add the butter and mix the ingredients until they are fully incorporated. The mixture will be slightly wet and sandy. Press the mixture into the bottom and sides of a greased pie pan. Bake in the preheated oven for 12 minutes. Remove and cool the pie crust slightly on a cooling rack.

3. Pour the filling into the warm crust and bake the pie until set, about 25-35 minutes, until pie is firm to the touch but the center is slightly jiggly (it will continue to set as it cools). Cool on a cooling rack for 1-2 hours and then refrigerate for an additional 2 hours or overnight.

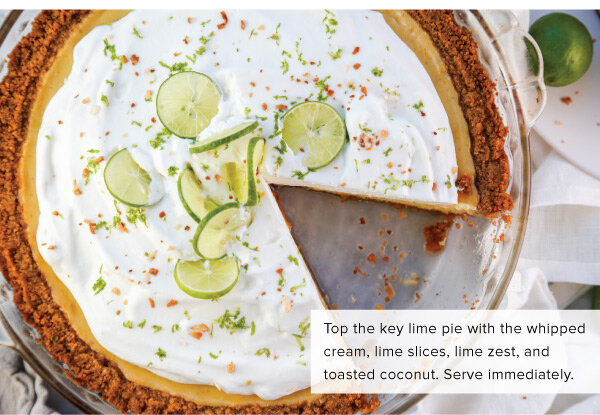
4. Once the pie has chilled, prepare the coconut whipped cream. In a stand mixer with the whisk attachment, pour the cold whipping cream, coconut cream, powdered sugar, and vanilla extract into a chilled bowl, and beat on high until stiff peaks form, about 3 minutes. Top the key lime pie with the whipped cream, lime slices, lime zest, and toasted coconut. Serve immediately.
 

French Toast Sticks

Lia Soneson

 
French-Toast-Sticks_v2_01.jpg

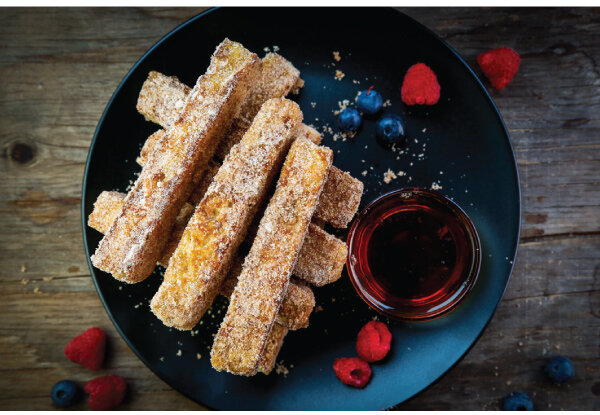
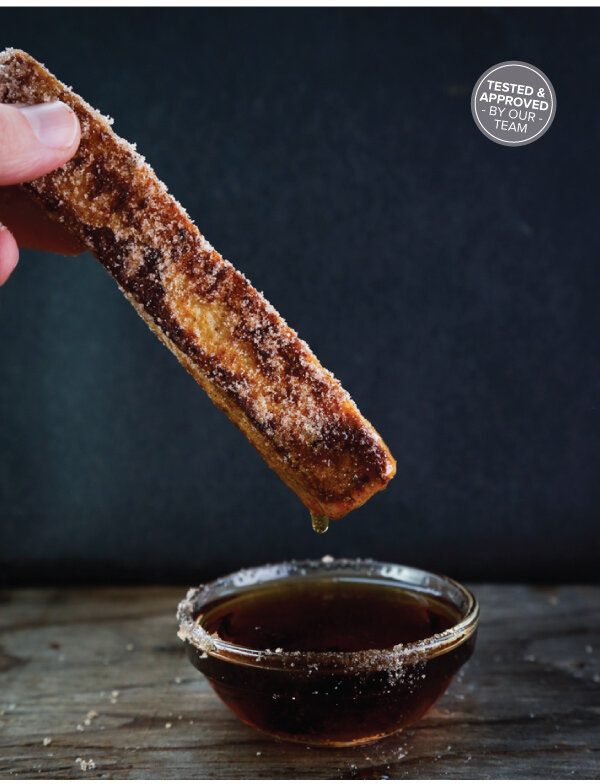
This week we are channeling our inner child with French toast sticks! The extra surface area achieved when preparing French toast sticks brings twice the flavor while enrobing wonderfully custardy insides. Their handy shape means they are destined for easy dipping, serving, and sharing with the whole family. Good Morning!

Cinnamon-Sugar French Toast Sticks
Serves 4

Ingredients:
1 large loaf bread (such as a brioche or Italian loaf that’s 3-4 days old)
3 eggs
3/4 cup heavy cream
1 teaspoon vanilla
1/4 teaspoon salt
1/2 teaspoon allspice
1/2 cup white sugar
1 tablespoon cinnamon
4 tablespoons salted butter, divided

For Serving:
Pure Maple syrup
Seasonal berries

Directions:
1. Trim the crust off of the bread and slice it into equally-sized strips, roughly 1" thick.

2. In a medium bowl, whisk together the eggs, cream, vanilla, salt, and allspice. Pour the mixture in a shallow bowl. In a small bowl, mix together the sugar and cinnamon. Spread the mixture out on a medium-sized plate.

3. Melt 2 tablespoons butter in a medium-large skillet.

4. Separate the bread sticks into two even batches. Starting with the first batch, dredge the bread sticks one at a time in the egg mixture by rolling them for a few seconds to evenly coat the bread all the way around. Shake off any excess egg mixture.

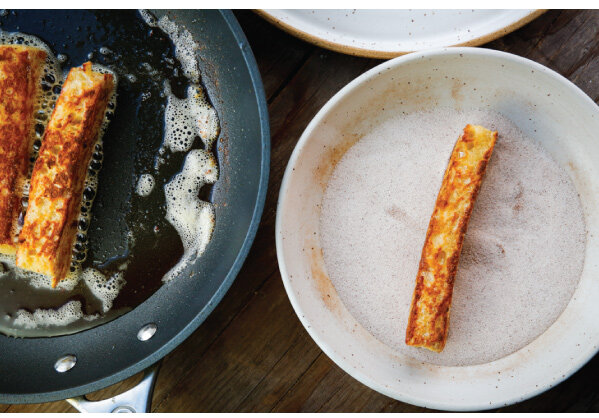
5. Place a few of the sticks of bread into the skillet, spacing them evenly, with about 1" in between (this spacing will make them easy to grab and turn). Cook the French toast sticks over medium-low heat using tongs to turn. Cook evenly until all sides are golden brown (roughly 1-2 minutes on each side).

6. Immediately remove the sticks from the pan and coat with the cinnamon and sugar while the French toast sticks are still hot, repeating until all of the sticks from the first batch are coated.

7. Melt the remaining 2 tablespoons of butter and repeat Steps 4-6 with the remaining sticks.

8. Once all the French toast sticks have been cooked and coated, serve immediately with warm maple syrup and fresh seasonal berries.


Classic Potato and Leek Gratin

Lia Soneson

 
Potato-Leek-Gratin_V3_01.jpg

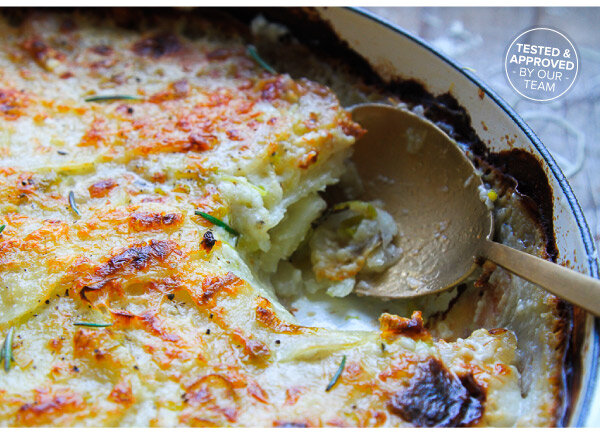
In this classic dish, thinly sliced potatoes are layered with a distinctive Mornay sauce. Mornay sauce is a Béchamel sauce with the addition of Gruyère cheese. The additions of savory leeks, garlic, and rosemary combine in a wonderful way in the sauce to infuse flavor into every bite. This recipe is a warm, comforting side dish, or hearty enough for the main event!

Classic Potato & Leek Gratin
Serves 6 - 8

Ingredients:
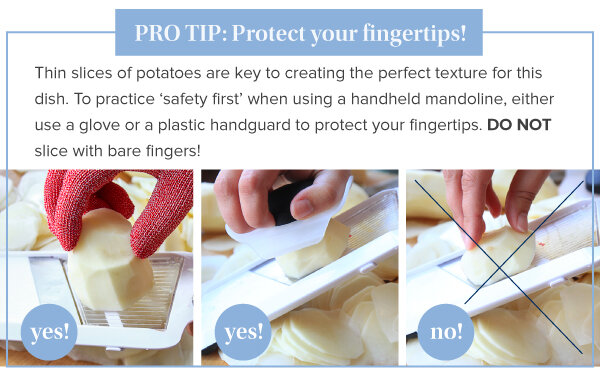
2 lbs Idaho potatoes (about 7-8 potatoes), washed, peeled, and thinly sliced with a mandoline
5 tablespoons butter, divided
3 small leeks, green parts removed, finely sliced
1 tablespoon rosemary, minced
4 cloves garlic, minced
1/4 cup all-purpose flour
3 cups whole milk
2 teaspoons kosher salt
1/4 teaspoon black pepper
1-1/2 cup grated Gruyère, plus
2 tablespoons reserved as topping

Directions:
1. Preheat the oven to 400°F.

2. Prep the potatoes. Use a sharp peeler to peel the potatoes. Rinse off, and then slice into 1/8” slices using a handheld mandoline.

3. In a large saucepan, melt 1 tablespoon butter and cook the leeks over medium heat until they are translucent, about 10 minutes. Add the rosemary and garlic and cook for about another 3 minutes.

4. Prepare the roux. In a separate, small saucepan, heat the remaining 4 tablespoons of butter. Once the butter has melted, whisk in the flour until the mixture is completely smooth. Continue cooking for about 1-2 minutes. This process removes the raw flour flavor and helps create a silky sauce.

5. Create a Béchamel sauce by very slowly pouring milk into the roux, continue whisking the mixture until the sauce is smooth. Add in the salt and pepper and continue whisking over medium-low heat for 3-5 minutes until the sauce thickens and becomes very creamy.

6. Transform the sauce into a Mornay sauce by slowly adding in the Gruyère cheese. Continue cooking and whisking for a few more minutes until the sauce is smooth, and the cheese is well incorporated. Add the cooked leeks mixture to the sauce.

7. Layer the gratin. Butter the bottom and sides of a large baking dish and lay a single layer of potatoes. Pour some of the sauce over the potatoes and continue to layer the potatoes, pouring more sauce at each layer. Repeat this step until all of the potatoes are used (or you get to within 1/2” from the top of your dish).

8. Coat the final layer of potatoes with sauce and sprinkle with the reserved cheese.

9. Cover the gratin with a tight fitting lid or foil and bake for 60 minutes. Remove the lid or foil, and continue to bake for another 10 minutes, or until the top turns golden brown.

10. Garnish with additional fresh pieces of rosemary, and serve hot.


Scallops with Lemon Pasta

Lia Soneson

 
Scallops_v2_01.jpg

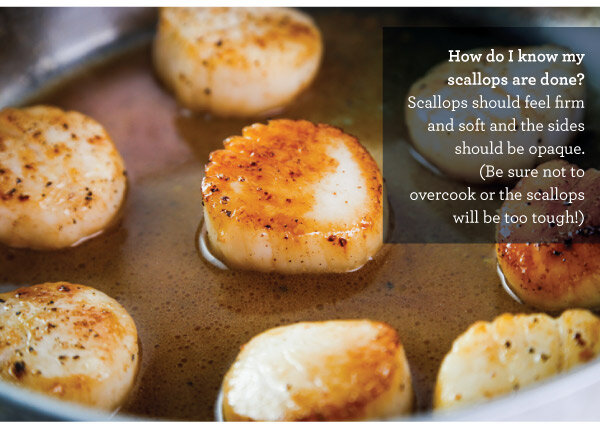
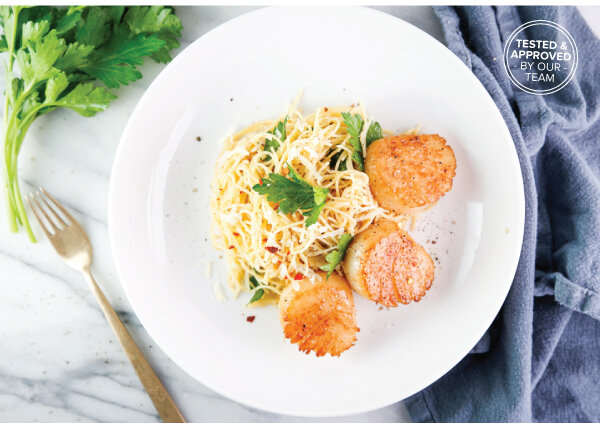
A classic romantic dinner for two, scallops and pasta make a great “date-night in”! Scallops are often referred to as the 'candy of the sea' — and for good reason! When cooked correctly, these beautiful morsels have the most delicate, sweet flavor. This issue showcases how to properly select and cook scallops — a presentation featuring a caramelized crust on the outside and a slightly-sweet, buttery-soft inside. Served on a bed of lemon-enhanced angel hair pasta, this meal is just as filling as it is fancy. 

Sugar-Seared Scallops with Lemon Pasta
Makes 2 generous servings

Sugar-Seared Scallop Ingredients:
10 sea scallops
1/4 teaspoon Kosher salt
1/4 teaspoon black pepper
2 tablespoons butter
2 tablespoons sugar
1 cup dry white wine

Lemon Pasta Ingredients:
1/2 lb angel hair pasta
5 tablespoons butter
5 cloves garlic, thinly sliced
1/2 teaspoon crushed red pepper flake
1-1/2 cup vegetable stock
1 tablespoon fresh lemon juice
1/2 tablespoon lemon zest
2 tablespoons fresh parsley, chopped
1/2 cup shredded parmesan
1/4 teaspoon salt
1/4 teaspoon pepper

Directions:
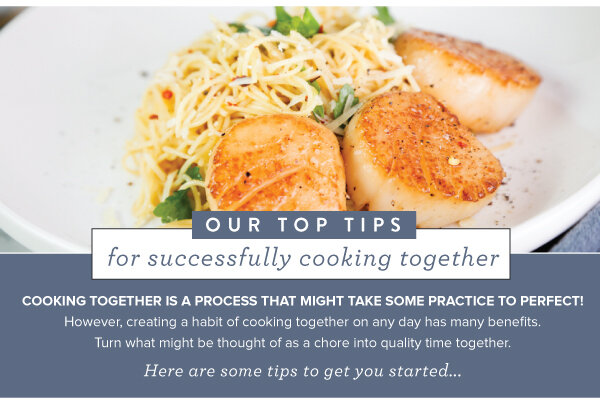
This is a great recipe to make with two chefs working together for a romantic meal! The first chef can focus on the pasta and sauce, while the second can sugar-sear the scallops. With both chefs working simultaneously, this dinner comes together quickly! 

CHEF ONE PREPARE THE PASTA:
1. Prepare the pasta sauce by melting the butter over medium heat. Add the garlic and cook for 1 minute until fragrant. Add the crushed red pepper and cook for another minute. Add the vegetable stock, lemon juice, and lemon zest, and cook for 5 minutes to allow the flavors to get friendly. 

2. Meanwhile, prepare the pasta by bringing a large pot of water to a rolling boil. Add a healthy dose of salt and add the pasta, cooking until al dente, about 2-3 minutes. Strain the pasta from the water and set aside until the scallops have seared.

CHEF TWO PREPARE THE SCALLOPS:
3. While Chef One makes the pasta, Chef Two can prepare the scallops. Gently rinse the scallops and pat dry with a paper towel. Gently remove the side muscle that secures the scallop to the shell, if necessary. Sprinkle the scallops with salt and pepper. Prepare a plate with a layer of sugar.

4. Sear the scallops. Heat the butter in a skillet on medium-high. While the butter heats, coat both sides of each scallop in sugar. Once the skillet is hot, work in two batches to cook the scallops. Place the scallops sugar-side down on the skillet, spacing them at least 1 inch apart, making sure not to crowd the pan. The scallops should sizzle on contact with the pan. If they start to brown too quickly, reduce the heat. Use tongs to gently flip and cook scallops for 2-3 more minutes. Scallops should release easily from the pan when they are ready to be turned. Remove the first batch of scallops from the pan and cook the second batch, reserving the pan juices. Deglaze the pan by adding the wine, and continue to cook the scallop juices and wine for another minute. Remove from the heat and set aside. 

WORK TOGETHER TO PLATE THE DINNER:
5. Just as the scallops finish searing, have Chef One stir the cooked pasta into the sauce. Use tongs to make sure the sauce fully coats the pasta. Sprinkle with parsley and parmesan and toss. 

6. Artfully plate the pasta and have Chef Two add the seared scallops on top. Drizzle the seared scallops with any remaining scallop pan juices. Sprinkle with additional salt and pepper and serve immediately. Enjoy!
 

Green Chile & Cheese Egg Bake Bites

Lia Soneson


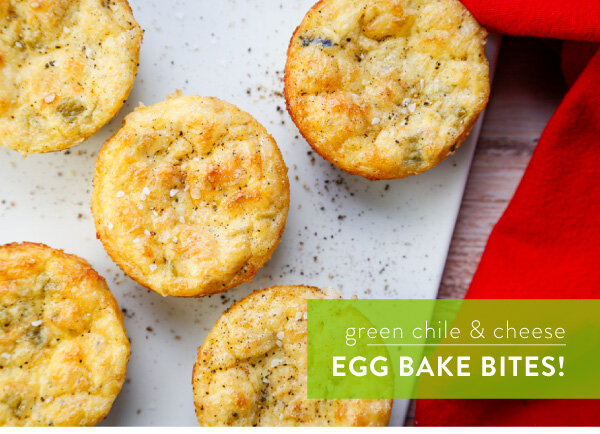
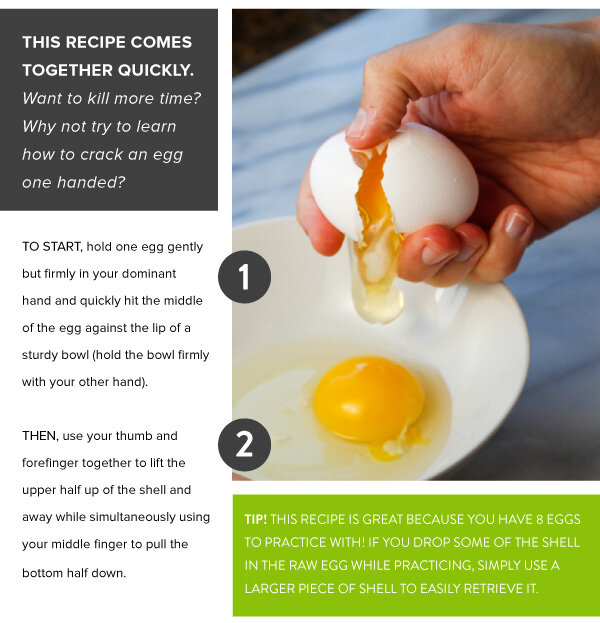
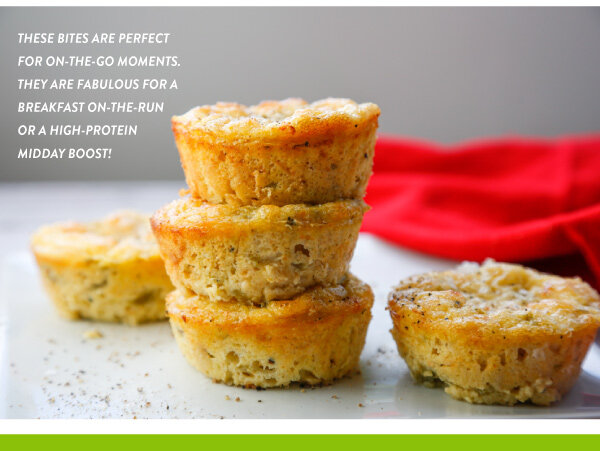
Holiday preparations are in full swing, and that means busier mornings and weekends. We find ourselves searching for protein-packed recipes that come together in a snap. These featured savory egg bake bites are just that! IN THIS ISSUE we share our favorite recipe for petite-sized breakfast bites, along with tips on how to crack an egg one-handed.

Green Chile & Cheese Egg Bake Bites
Makes 12 egg bites

Busy mornings are the norm! We often find ourselves searching for satisfying, protein-packed recipes that come together in a snap to help us approach the day with some solid nourishment. You’ll find that these savory egg bake bites are just that -- delicious, satisfying, and easy!

Ingredients:
1/2 cup butter, melted, plus 2 tablespoons softened
1/4 cup flour
1/2 teaspoon baking powder
1/4 teaspoon Kosher salt
1/2 teaspoon pepper
1/2 teaspoon paprika
8 eggs
3/4 cup small curd cottage cheese
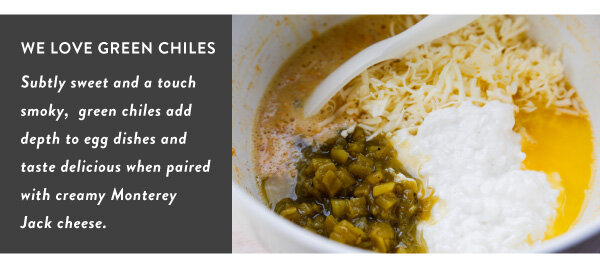
7 oz can chopped green chiles
2 cups grated Monterey Jack cheese (about 8 oz)

Directions:
1. Preheat the oven to 350°F. Generously butter the cups of a standard-sized mun pan with the softened butter.

2. In a medium bowl, mix together the flour, baking powder, salt, pepper, and paprika.

3. In a large bowl, whisk the eggs. Slowly add the dry ingredients to the egg mixture and whisk to combine.

4. Stir in the melted butter, cottage cheese, green chiles, and Monterey Jack cheese and continue stirring until the ingredients are incorporated.

5. Use a measuring cup to evenly distribute the egg mix into the 12 prepared cups of the mun pan.

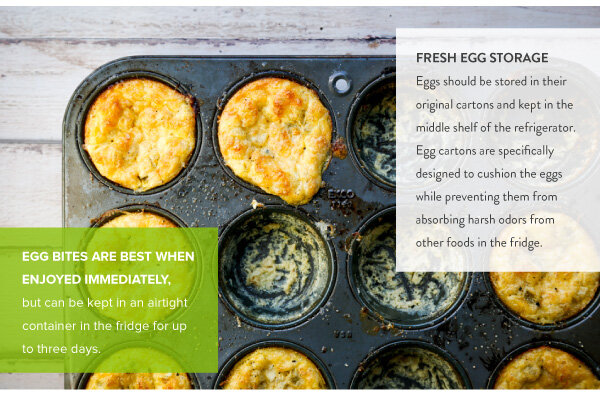
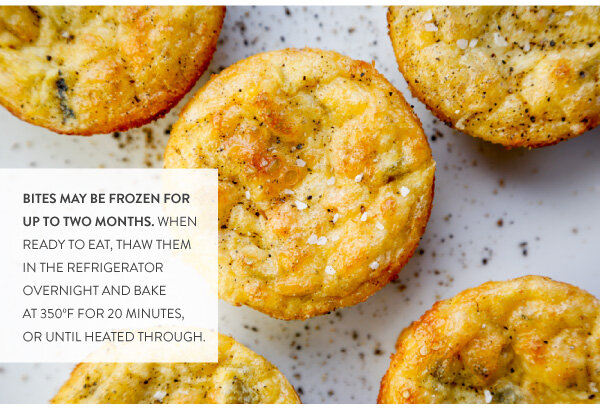
6. Bake until set, about 20-25 min. Let the egg bake bites cool in the pan before removing. Eat while warm or store in the refrigerator for 3 days in an air-tight container, or wrap well and store in the freezer for up to two months.


Salted Caramels

Lia Soneson

 
Caramels_2020_v2_01.jpg

Everyone loves the captivating flavors of fresh homemade caramels! 

The little known secret? They are deceptively easy to make. Fresh, homemade caramels make great treats for sharing as little gifts in the holiday weeks ahead. IN THIS ISSUE, we show you, step-by-step, how to  master boutique caramels made in your own kitchen.

Handcrafted Caramels
Makes about 120 - 140 pieces, depending on size

Ingredients:
Vegetable oil (for coating pan)
3 cups heavy cream
3 cups granulated white sugar
1 cup brown sugar, packed
2 cups light corn syrup
1-1/2 teaspoons Kosher salt
1/2 cup (1 stick) unsalted butter
2 teaspoons vanilla extract

Directions:
1. Prepare a 9 x 13 rimmed pan prior to starting to cook. Oil the bottom and sides of the pan well using a tasteless vegetable oil, one that stays liquid at room temperature. Line the pan with a criss-cross of parchment paper cut to match the pan’s size with a little extra at the ends; avoid any wrinkles in the corners. Set aside. 

2. Wipe the interior of a large saucepan or Dutch oven with a light coating of oil. Measure the heavy cream, sugars, light corn syrup and salt into the pan. Over medium-low heat, stir the ingredients together until well-combined and the sugar is dissolved.

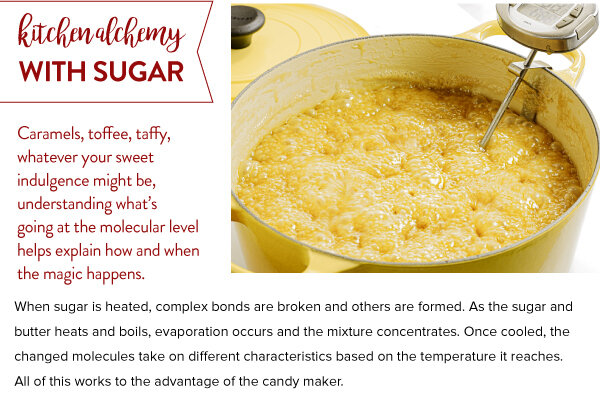
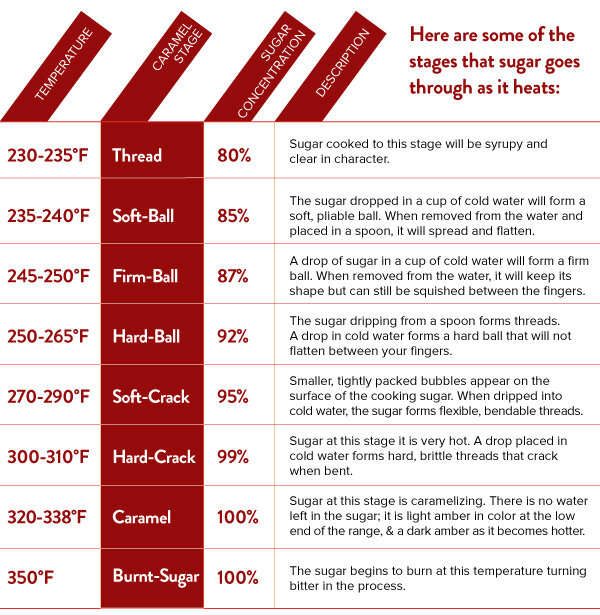
3. Increase the heat to medium. Continue stirring until the cream-sugar mixture reaches a boil. Stop stirring. Using a brush dipped in warm water, wash down any sugar crystals that may have formed on the edge of the pan. Allow the mixture to cook, without stirring, until it reaches the firm-ball stage, around 248°F as measured on a candy thermometer clamped to the side of the pan. (If you do not have a candy thermometer, use a water test to check for the appropriate sugar stage. A drop (approximately 1/4 teaspoon) of caramel in cold water should form a firm ball, yet be pliable.)

4. Remove the caramel from heat, add the butter and vanilla stirring until melted and well-combined with the cream-sugar mixture. (Cutting the butter into half-inch cubes will help to efficiently melt and distribute this key ingredient.)

5. Carefully pour the caramel into the prepared, lined pan. Allow the caramel to set and cool to room temperature. This will take several hours or overnight. (For evenly sized caramels, make sure the pan is setting on a level surface.)

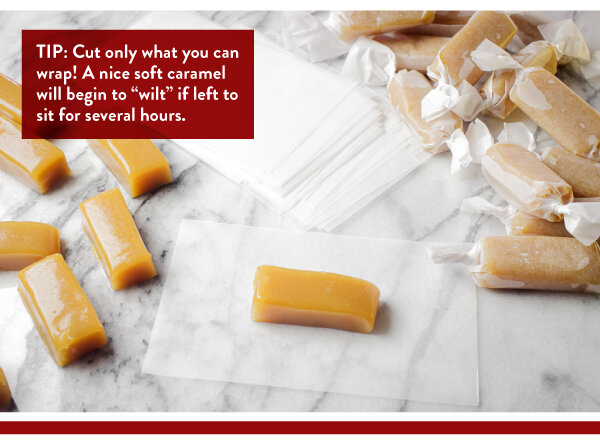
6. Once cooled, lift the sheet of caramel from the pan to a safe cutting surface. The caramel should retain its shape. Neaten the edges of the caramel to remove the rounded edges. Cut the caramel slab vertically and horizontally in desired sizes and shapes with a long-bladed cook’s knife. We suggest 1-1/4-inch by 1/2-inch pieces, or 1-inch squares. Wrap the pieces in nonstick wrap such as parchment paper. Store at cool room temperatures for up to 2-3 weeks.


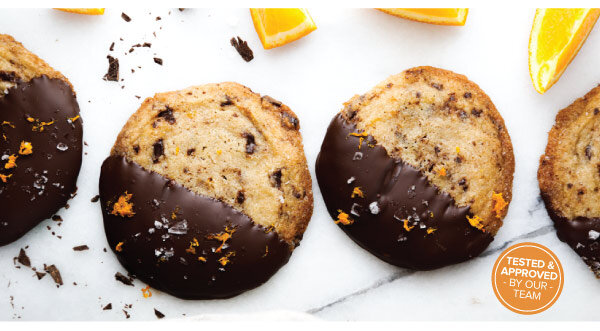
Chocolate Orange Holiday Cookies

Lia Soneson


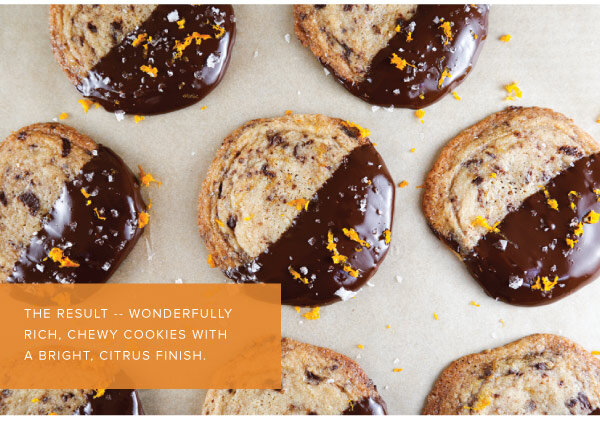
Chocolate Orange Cookies - Slice & Bake Makes about 24 cookies

Ingredients:
1 cup unsalted butter, softened
1/2 cup light brown sugar, packed
1-1/4 cups granulated sugar
1 large egg, room temperature
1 teaspoon pure almond extract
1 teaspoon freshly squeezed orange juice
2-1/4 cups all purpose flour
1/4 teaspoon salt
1/4 teaspoon cardamom
1 tablespoon orange zest (about 1 medium orange)
4 oz dark chocolate chunks, finely chopped, plus 16 oz dark chocolate chunks for melting
Coarse sugar for rolling, (such as sugar in the raw)
Flake sea salt
Additional orange zest for sprinkling

Directions:
1. In a stand mixer with a paddle attachment, beat the butter on medium speed until smooth. Add the sugars and beat on medium until light and fluffy. Add the egg and almond extract and beat on high speed until the ingredients are fully combined, roughly 5 minutes. Scrape down the sides and the bottom of the bowl with a spatula as needed. Add the orange juice and continue mixing for another minute.

2. Sift the flour in a separate bowl and mix in the salt and cardamom. Slowly add the dry ingredients to the wet ingredients 1/2 cup at a time, mixing on low speed until fully incorporated. Fold in the orange zest and the 4 oz of finely chopped chocolate until evenly distributed. Gather and remove the dough from the mixer.

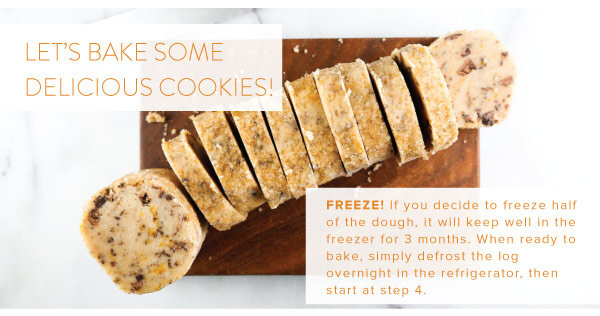
3. On a floured surface, divide the dough in half. Roll each half into a log, about 2-1/2 inches in diameter, and wrap in plastic wrap. Completely chill the dough (for at least 2 hrs, or for up to 1 week).

4. When ready to bake, preheat the oven to 350°F. Remove one of the dough logs from the refrigerator. Roll the logs in the coarse sugar and use a sharp, serrated knife to slice the log into individual rounds, roughly 1/2" thick. Place the cookies on a large cookie sheet, roughly 2" apart and bake for 12 minutes, or until the edges of cookies are just starting to brown. Cool on the cookie sheet for 2 minutes, then transfer to a cooling rack.

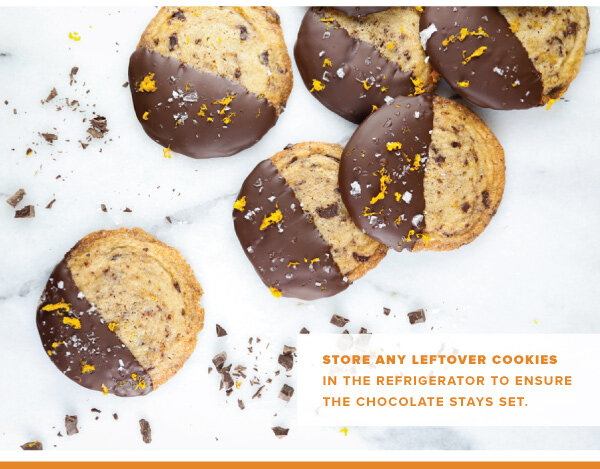
5. While the cookies are cooling, melt 16 oz of chocolate in a double boiler or in the microwave (careful not to burn the chocolate if microwaving!). Dip each cookie halfway into the chocolate to coat one half, and place the half-coated cookie on a parchment paper, or a silicone-lined baking sheet. While the chocolate is still warm, sprinkle the cookies with the flake salt and orange zest. Place the baking sheet in the refrigerator for about 30 minutes to allow the chocolate set. Store the cookies in the refrigerator to ensure the chocolate stays set.


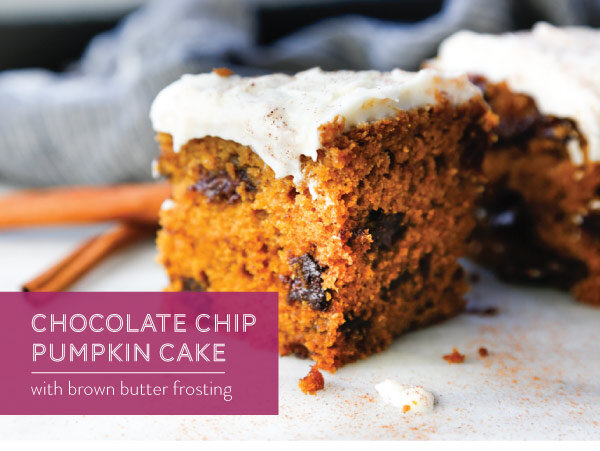
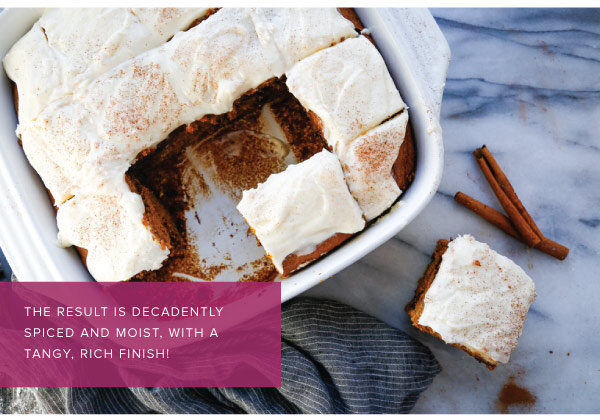
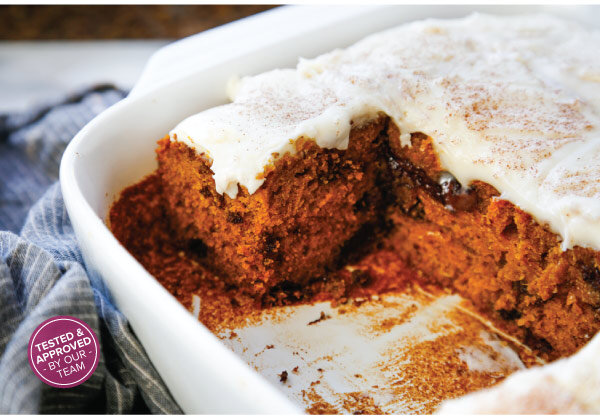
Chocolate Chip Pumpkin Cake with Brown Butter Cream Cheese Frosting

Lia Soneson


Biting into this cake signifies all of the things we love about the changing seasons. Warm notes of fall spices pleasantly mix with sweet chocolate and rich brown butter frosting. In this recipe, we highlight pumpkin in a cake that can be served both after dinner or alongside your morning coffee.

Chocolate Chip Pumpkin Cake with Brown Butter Cream Cheese Frosting
Makes 12 pieces

Biting into this cake signifies all of the things we love about the changing seasons. Warm notes of fall spices pleasantly mix with sweet chocolate and rich brown butter frosting. This recipe highlights pumpkin in a cake that can be served both after dinner or alongside your morning coffee.

Ingredients:
4 eggs
1/2 cup white sugar
1 cup light brown sugar, packed
1 cup vegetable oil
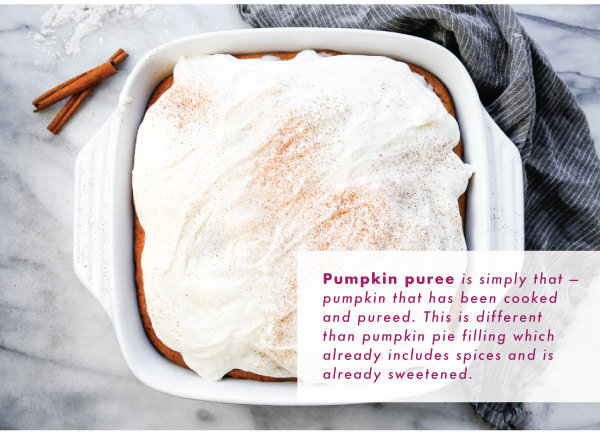
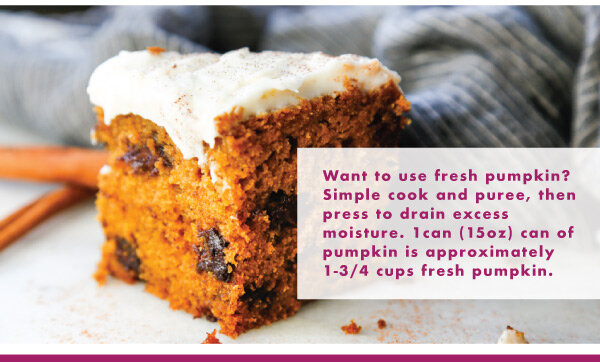
1 can (15 oz) pumpkin puree
2 cups all purpose flour
2 teaspoons baking powder
1 teaspoon baking soda
1-1/2 teaspoons ground cinnamon
1/4 teaspoon ground nutmeg
1/4 teaspoon ground ginger
1/4 teaspoon ground clove
1 teaspoon ground allspice
1/2 teaspoon Kosher salt
1-1/4 cup dark chocolate chips

Brown Butter Frosting Ingredients:
1/2 cup butter
8 oz cream cheese, softened
1 teaspoon vanilla
3 cups confectioners’ sugar
1/4 teaspoon cinnamon for sprinkling

Directions:
1. Preheat the oven to 350°F.

2. In a stand mixer on medium-low speed, mix the eggs, white sugar, brown sugar, oil and pumpkin puree until incorporated. In a separate bowl, sift together the flour, baking powder, baking soda, cinnamon, nutmeg, ginger, clove, allspice, and salt.

3. Slowly add the flour mixture to the pumpkin mixture and continue to mix until combined. Fold in the chocolate chips.

4. Pour the batter into a 10” x 10” ungreased baking dish. Bake for 40-45 minutes or until a toothpick comes out clean. If the top or edges brown before the rest of the cake has baked, tent aluminum foil over the top. Cool on a cooling rack.

5. Make the frosting: Melt the butter in a small saucepan. Continue cooking over medium heat, stirring often, until the butter turns a light golden brown, about 5 minutes. Be careful not to burn the butter! Remove from heat and let the butter cool. In a stand mixer, mix together the cream cheese and the browned butter until fluffy. Add the vanilla and mix. Gradually add the confectioners’, sugar continuing to mix until smooth.

6. Once the cake has completely cooled, generously spread the frosting over the top of the cake in a thick layer. Dust with cinnamon and enjoy!


Easy Tikka Masala & Basmati Rice

Lia Soneson


In this recipe, we bring the wonderful flavors of chicken tikka masala to the table on any day of the week, thanks to the amazingly fast electric pressure cooker! Serve with fragrant basmati rice and generous sprinkles of chopped cilantro. YUM!

Easy_Tikka_v3_12.jpg

Easy Chicken Tikka Masala
Serves 4 - 6

Bring the wonderful flavors of this delicious dish home any day of the week thanks to the amazingly fast electric pressure cooker! This recipe calls for a lighter approach using slightly less butter than other recipes. A combination of Greek yogurt and coconut milk (instead of heavy whipping cream) adds a bit of extra tanginess to the global flavors. Savory spices mingle with fresh garlic, ginger, and tomatoes. The coconut milk creates a dreamy, silky sauce. Serve with fragrant basmati rice and generous sprinkles of chopped cilantro.

Ingredients:
4 large boneless chicken breasts, cut into 1” chunks
5 cloves garlic, finely minced
1-1/2 tablespoons fresh ginger, finely grated
3 tablespoons tomato paste
1 (28 oz.) can crushed tomatoes
2-1/2 teaspoons Garam Masala, divided
1 tablespoon ground cumin
1 tablespoon paprika
1/2 teaspoon cayenne pepper
1 teaspoon ground coriander
2 teaspoons Kosher salt
1/2 teaspoon ground black pepper
1 cup coconut milk
1 cup plain Greek yogurt
4 tablespoons butter, sliced into tablespoons
1 tablespoon cilantro, minced, plus additional for garnish

Electric Pressure Cooker Directions:
1. Prepare the garlic and ginger. Mince the garlic finely and grate the ginger into a fine paste. 

2. Place the cut chicken in the bottom of an electric pressure cooker and then toss with the garlic and ginger.

3. In a large bowl, whisk together the tomato paste and crushed tomatoes until well combined.

4. Add the spices to the tomato mixture: 2 teaspoons Garam Masala, cumin, paprika, cayenne, coriander, Kosher salt, and black pepper. Stir until well combined.

5. Pour the spiced tomato mixture over the chicken. Toss until coated.

6. Cover, and cook on high pressure for 10 minutes.

7. Carefully release the pressure according to your appliance’s instructions. Check that the chicken is fully cooked and is at 165 degrees F. If the chicken needs more time, continue to cook on the simmer function until the chicken reaches 165 degrees in the center.

8. Once the chicken is fully cooked, add the coconut milk, yogurt, butter, 1/2 teaspoon Garam Masala and minced cilantro. Stir until combined and a sauce begins to form. If the sauce needs additional time to thicken, switch to the simmer function, and stir and simmer until the sauce thickens to your desired consistency.

9. Serve warm over basmati rice. Garnish with additional minced cilantro.

Basmati Rice:
1 tablespoon butter
2 tablespoons shallot, minced
2 cups basmati rice, rinsed
1/2 teaspoon Kosher salt
3-1/2 cups water

Rice Directions:
1. Rinse rice with cold water until the water runs clear.

2. Using a heavy-bottomed pot with a lid, sauté the shallot in the butter until the the shallot becomes translucent. Add the rice, and stir it until coated and every grain has a sheen.

3. Add the water and salt, and bring to a boil. Stir occasionally to make sure that the rice doesn't stick to the bottom. Once boiling, turn the heat to low and cover with a tight-fitting lid. Simmer the rice on low for 18-20 minutes or until the rice becomes tender.

4. Remove from heat, and let set for 10 minutes with the lid still on. Fluff with a fork before serving.


Make Your Own Summer Blueberry Hand Pies

Lia Soneson

 
Blueberry_HandPies_v1_01.jpg

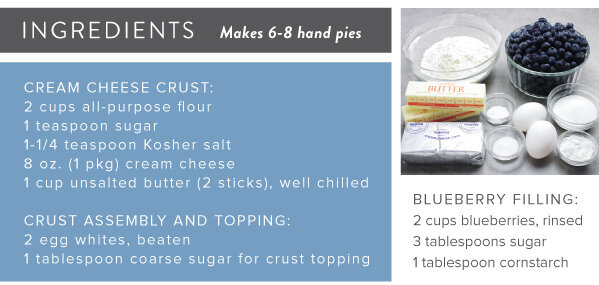
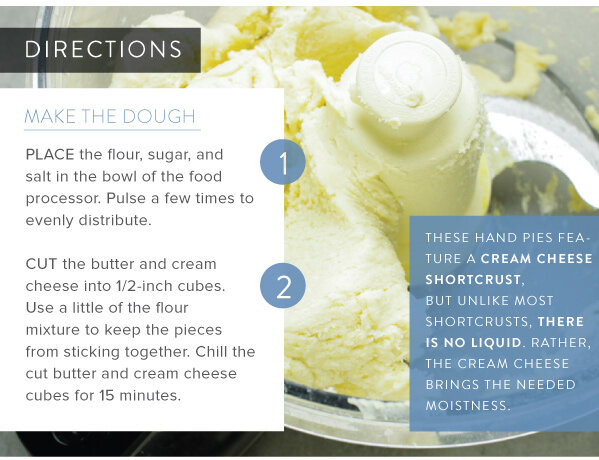
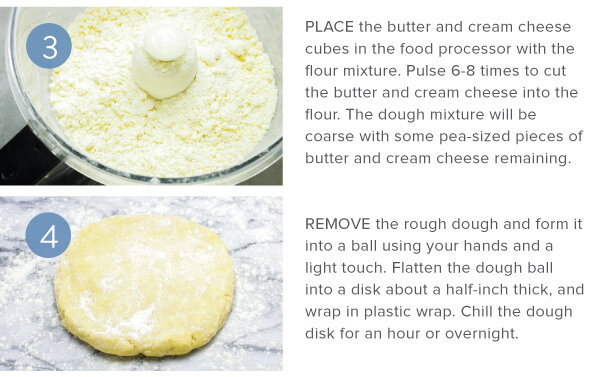
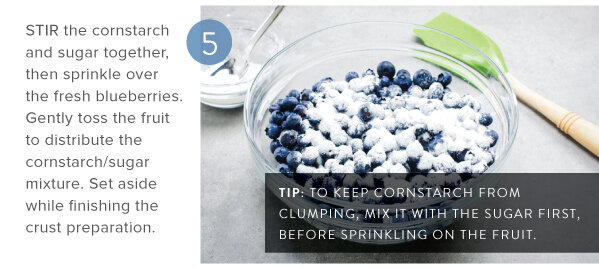
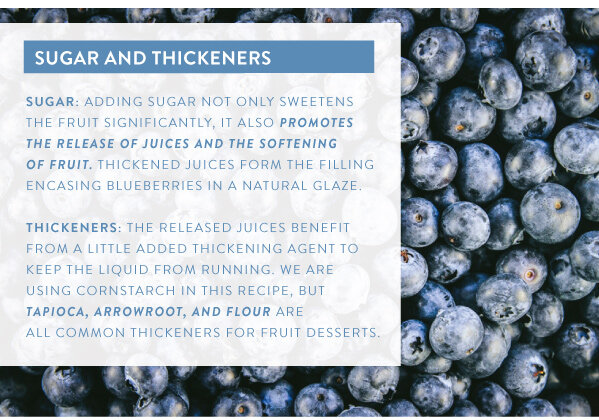
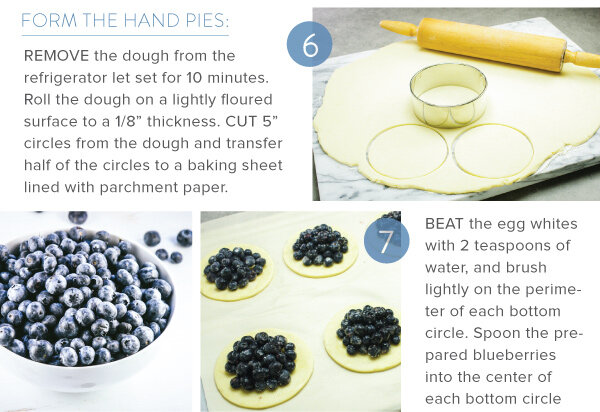
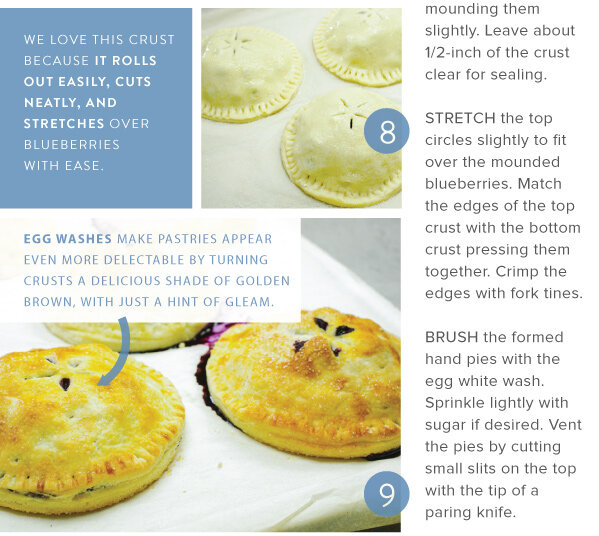
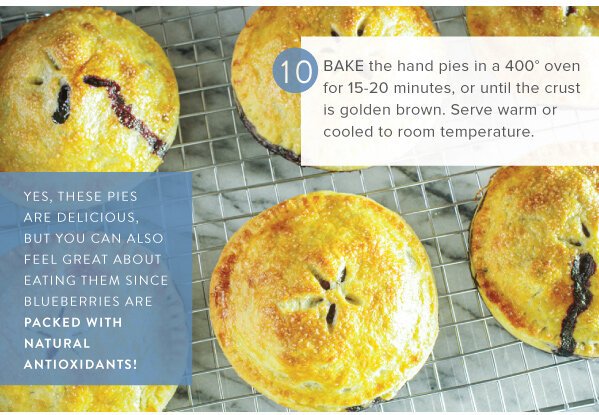
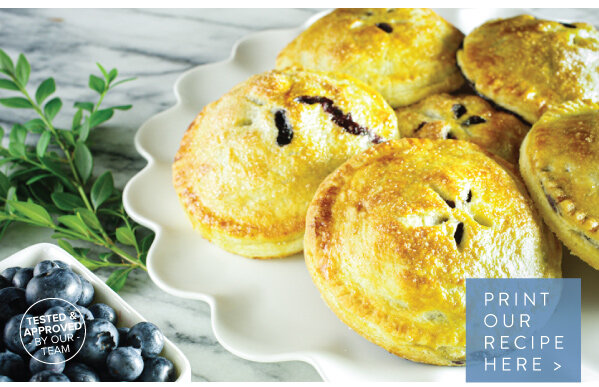
SUMMER BLUEBERRIES burst with a flavor that only happens when truly in season. One of our favorite ways to celebrate these little nutritional powerhouses is to place them in hand pies. The berries’ diminutive size fit neatly into petite packets, which highlight the rich cream cheese-based crust — a truly mouth-watering match!


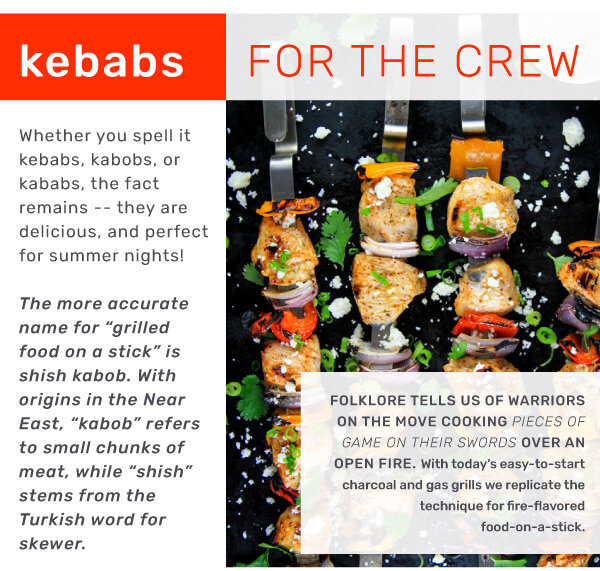
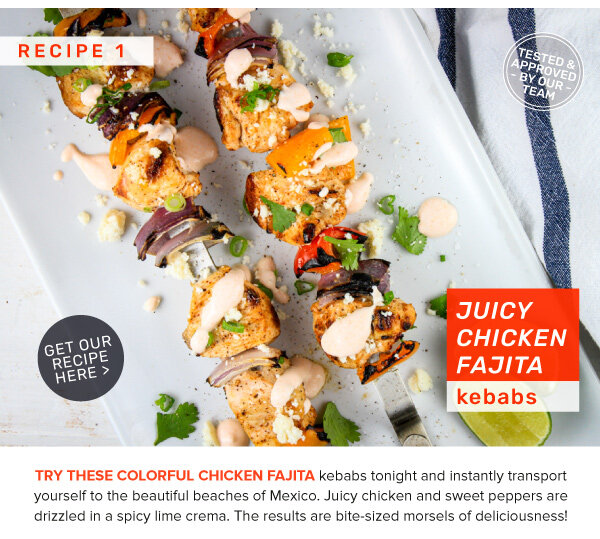
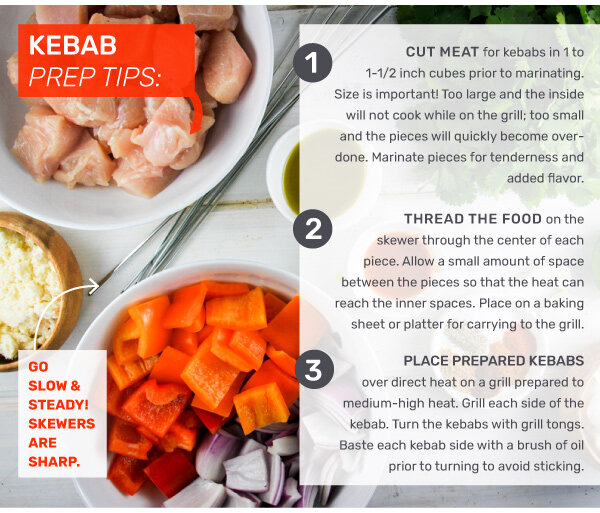
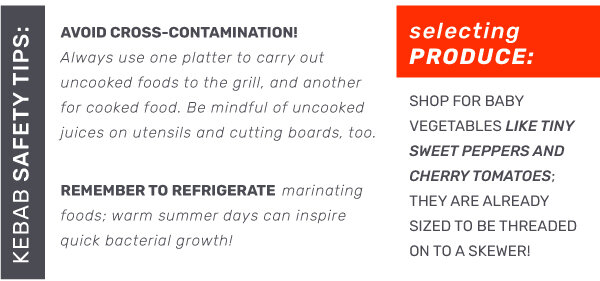
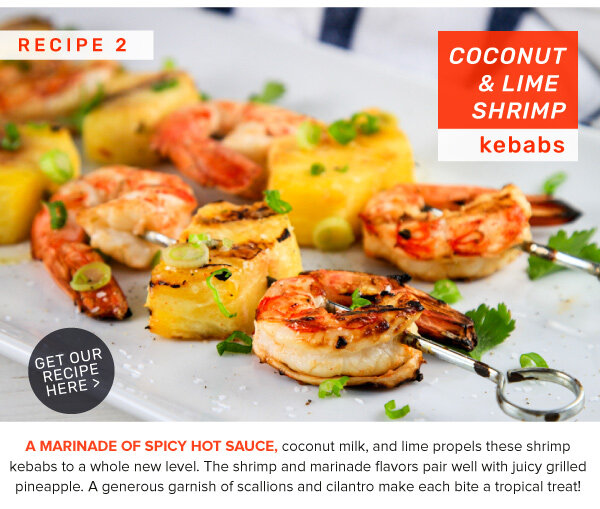
Tips for Grilling Kebabs! PLUS, Three Delicious Recipes

Lia Soneson

 
Kebabs2020_v2_01.jpg

The warm summer nights are a constant invitation to light up the grill. The grill anchors the outdoor kitchen, and becomes the center for al fresco dining and leisurely time spent with the family.
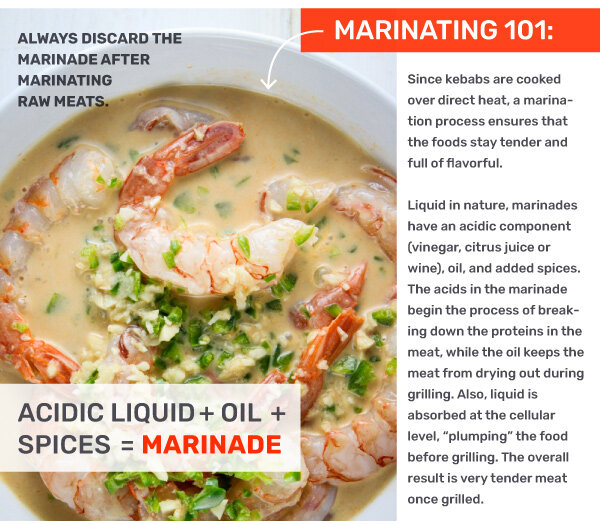
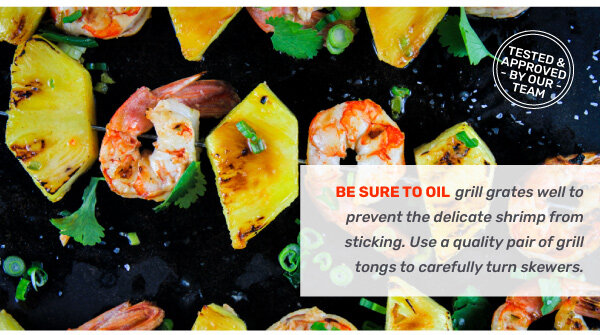
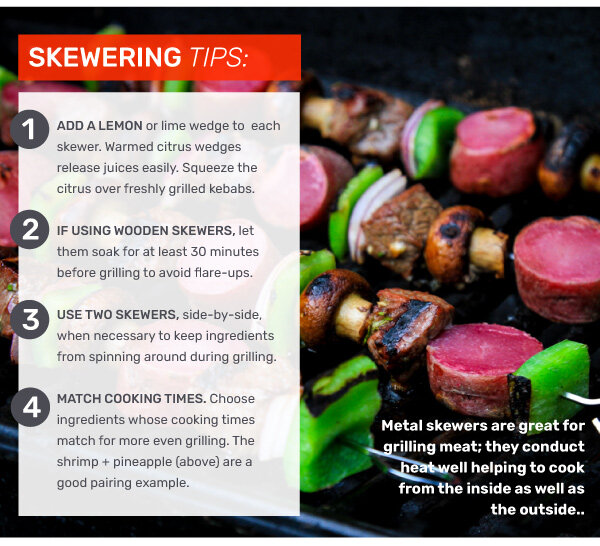
IN THIS ISSUE, we're grilling colorful kebabs made extra-delicious thanks to mouth-watering marinades. Try skewering up one of these three kebab recipes for a tasty summer supper on the grill.
 

Fresh Cream Puffs with Berry Filling

Lia Soneson

 
Cream_Puffs_v3_01.jpg
Expanding your repertoire of kitchen skills these days? Add cream puffs to your list of culinary mastery while celebrating the return of fresh berries. The light, delicate, cream puffs with sweet berry filling are perfect for Mother’s Day, too! This recipe starts with a classic French pâte à choux and finishes things off with bright, jammy berries, and homemade whipped cream.
 

A Festive Holiday Dinner Menu!

Lia Soneson

 
Holiday_Dinner2019_v1_01.jpg
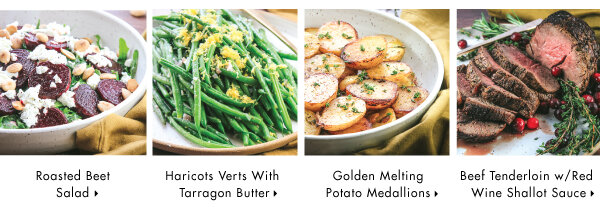
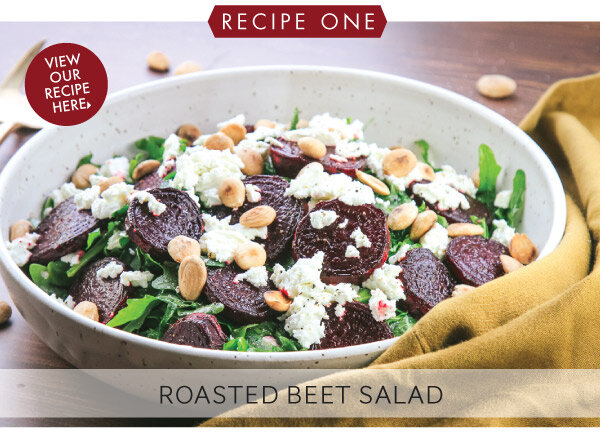
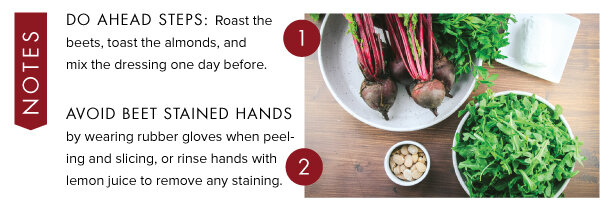
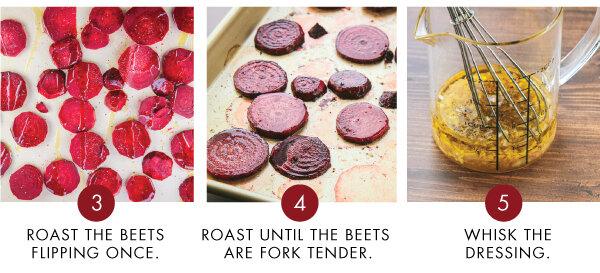
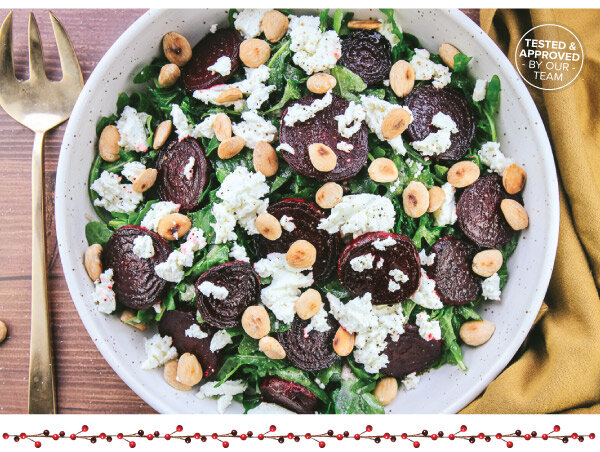
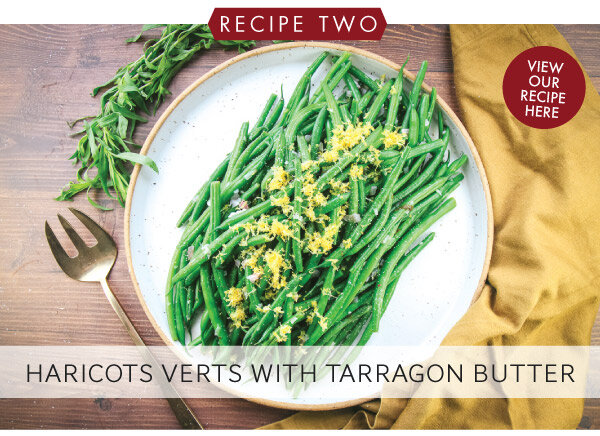
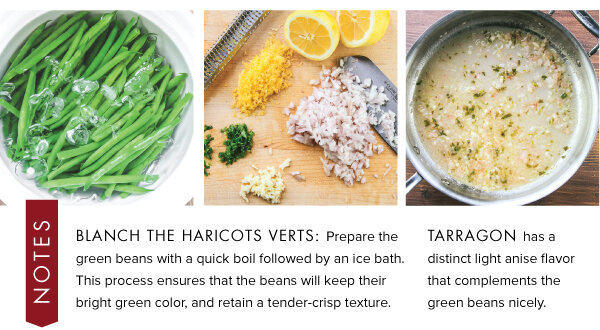
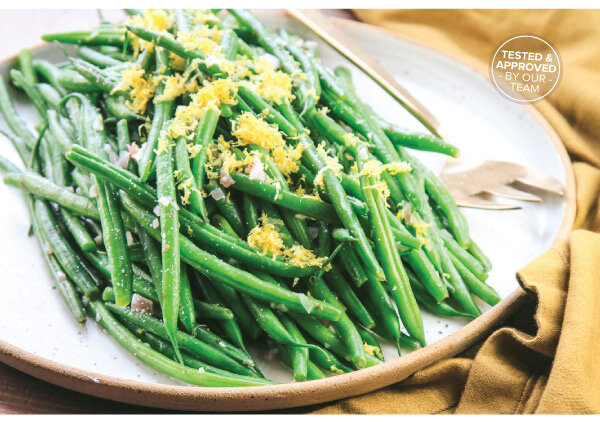
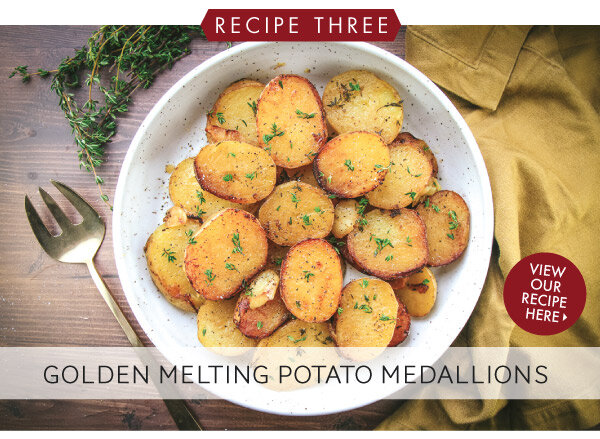
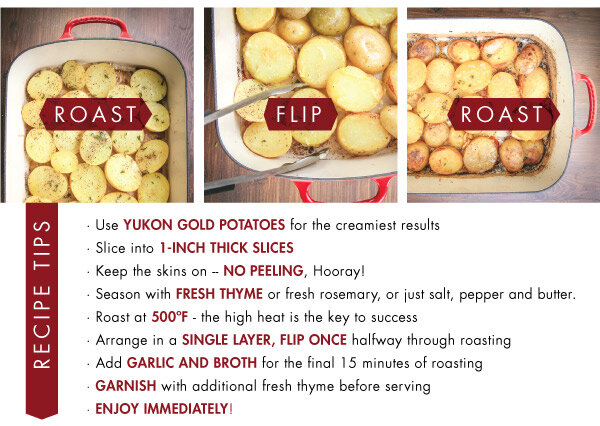
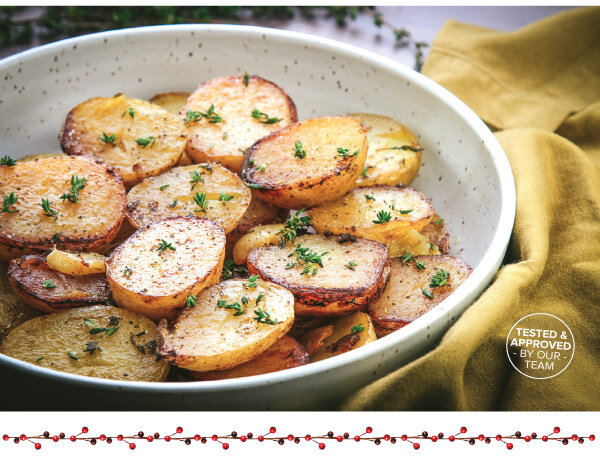
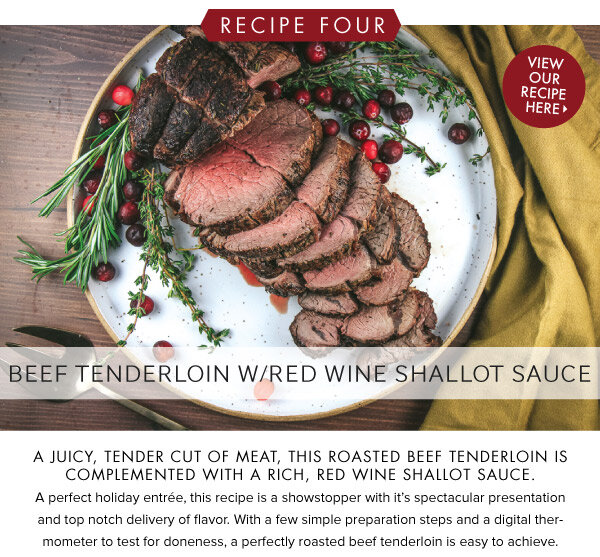
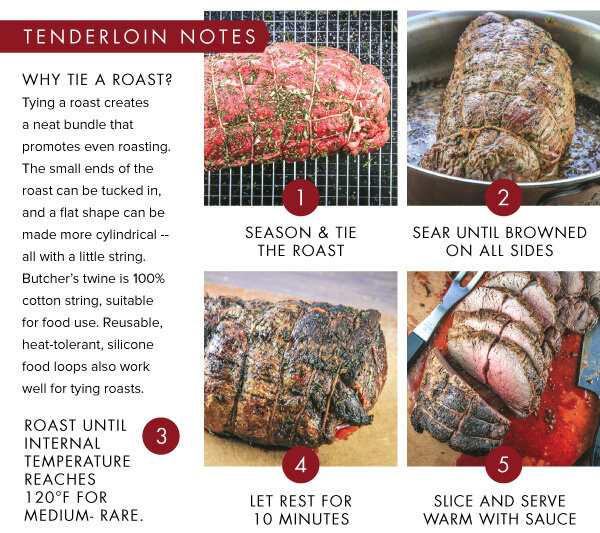
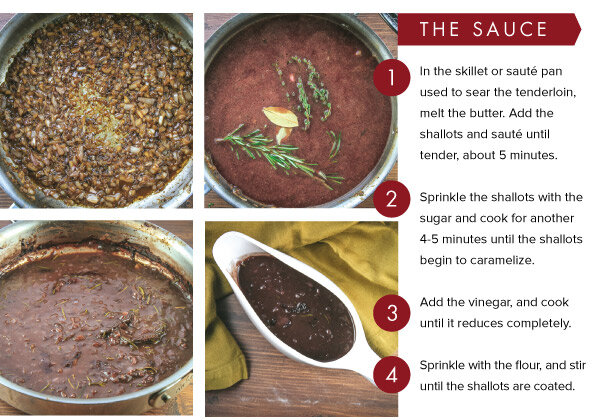
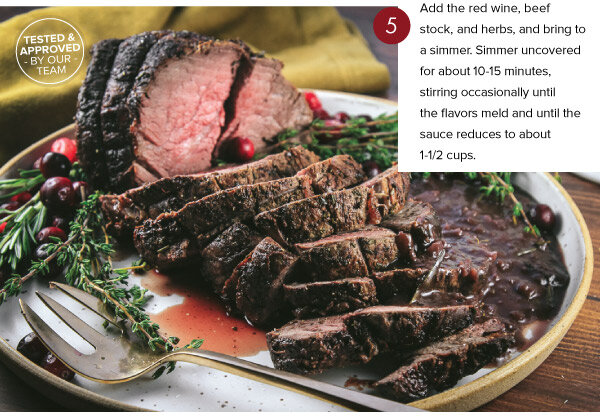
THE HOLIDAY SEASON CALLS FOR MANY GATHERINGS OF FAMILY AND FRIENDS AROUND DELICIOUS FOOD. IN THIS ISSUE, we feature four recipes that make a perfect menu for a special, festive gathering. The meal begins with a Roasted Beet Salad, showcases two stunning side dishes, Haricots Verts with Tarragon Butter, and Golden Melting Potato Medallions, and features a perfectly roasted Beef Tenderloin with Red Wine Shallot Sauce as the entree. Happy Holidays to You and Yours!